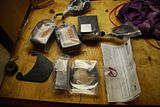
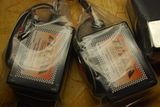
Several months back I ordered a Biketronics BT480 Class D amplifier to go with the Biketronics Hertz BT445 speakers I already had. Well the amplifier came and it has sat on the bench for nearly two months now, why?, Football Season. Well today was the day that I was installing the amp. Off to the shop I went. After firing up the heat I opened the Biketronics box and laid out the included pieces. I than flipped through the directions to identify the components lying on the bench in front of me. At first glance the directions can be a little confusing or maybe I just couldn’t follow along.
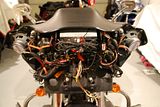
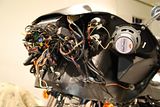
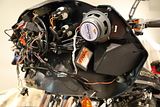
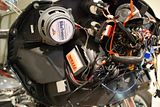
I removed the fairing from the bike and roughly laid out where the amp(s) were going to go. NOTE: the ”amp” is actually two amps and a mystery box. While all relatively small I was under the assumption it would be a single box like pictured on the web site, no big deal. I cleaned the area where I was going to mount the amps with an alcohol swab (not included). I than ran the wiring harness from the two amps to the mystery box (still don’t know what it is!). With that done I had to run a ground, a hot to the battery and a powered hot. Since I’m running an aftermarket radio I was able to use a Blue powered wire from the head unit to power the amps. I ran the direct power (fused) wire under the tank directly to the battery. The next time I have the tank off I’ll fix this as it is just floating around under there right now. I attached the ground to where I have several other grounds attached, a fairing mounting bolt. At this point it was all ready to go. I connected the battery cables and turned on the ignition. My initial impression was it was ”ok”. I loaded a Godsmack CD and turned up the volume, much better. A little fine tuning of the radio EQ and we were making some noise!
At this point I was happy with the ease of the install and the sound so I installed the fairing. Lets try it again with the fairing on. I turn on the power and I have a humming, WTF? So I pull the fairing back off and started checking my wire connections, no change. I looked to make sure I didn’t pinch a wire installing the fairing (I have done that before!), nothing. I disconnected the RCA inputs from the amp to the radio and there it was. Hmm the instructions state that I can use the radio RCA outputs, guess not. Luckily the kit comes with a RCA to speaker lead conversion box. I installed it and everything worked as it was suppose to. So back on the fairing goes. Again I test everything (including my lights) and everything is perfect.
Godsmack goes back in and I twist the volume knob to almost full volume, dam it is loud. I dialed in the settings to my sound preference with a big smile on my face. I would have never thought you could get that much bass out of 5 ¼” speakers. Now they are not subs by any means however they are WAY better than anything I have had in this bike so far powered off of just the head unit.
The amp and speakers carry a $700.00 retail price which makes the setup competitively priced with the other major players on the market. For me the LIFETIME warranty was a nice bonus (the others may have that also). I didn’t have to cut or splice a single wire as everything was Plug and Play. The amps boast something called StatorGuard which I have no idea what that is but it sounds impressive.
I’m off to Daytona in March and that will be the first time I get to road test the system. In the garage it sounds fantastic!


 Author
Topic: Biketronics BT480 install (Read 2488 times)
Author
Topic: Biketronics BT480 install (Read 2488 times)