Please login or register.

Login with username, password and session length
Advanced search  

Author Topic: 2013 SEUC Detachable Tour-Pac - My Summary  (Read 6686 times)

0 Members and 1 Guest are viewing this topic.

kiro

  • 1K CVO Member
  • *
  • Offline Offline
  • Posts: 1658
    • ME


    • CVO1: 2017 FLHTKSE
    • CVO2: 1986 FXR Super Glide - antique, but the Evo lives on!
    • A Shot in the Dark
2013 SEUC Detachable Tour-Pac - My Summary
« on: June 09, 2015, 02:11:25 PM »

As others have on the forum, I decided to make my King Tour Pac detachable on my CUSE8, using the H-D Detachable Tour-Pac Conversion kit, 53246-09B. My son Matt is a good mechanic with a lot of motorcycle experience and we did this together in my driveway.
Code: [Select]
http://www.kiroastro.com/images/harleys/R6306.jpg
I wanted to modify the bike for around town riding without the tour-pac, so in the immediate timeframe decided to remove it along with the amp, disabling all audio until making a determination for the amp relocation. I have audio capability through a Sena 20S Blue-Tooth headset linked to my phone to use in the interim.
Code: [Select]
http://www.kiroastro.com/images/harleys/interior.jpg
Although the amp under the tour-pac is problematic, the MoCo did okay with disconnects for all the components in/around it. We labeled all the wiring and photographed everything in high resolution for record and ‘just in case’ during the process. On my bike the power locks to the side bags were already isolated so nothing had to be done to retain this function.
Code: [Select]
http://www.kiroastro.com/images/harleys/wiring.jpg
With the wiring addressed, the four bolts holding the tour-pac were removed and it was dismounted. I already had an Anderson relocator plate installed as can be viewed in the image below.
Code: [Select]
http://www.kiroastro.com/images/harleys/6989.jpg
With the pac removed the balance of the disconnect kit could be installed. For anyone that just has to know what a King Tour-pac actually weighs see the image below. Mine was 46.2 pounds empty with the liners removed.
Code: [Select]
http://www.kiroastro.com/images/harleys/weight.jpg
The detachable hardware was installed and the two-up platform fitted. This didn’t present any significant challenges with the kit instructions. Once the platform was adjusted we reinstalled it and the Anderson relocator on the tour-pac and tried it with the detach rack. It worked fine but I think this would prove difficult as a one person operation if being careful not to scratch anything.
Code: [Select]
http://www.kiroastro.com/images/harleys/hardware.jpg
I'd been researching and talked to several parts people at two dealerships thinking about the license plate relocation. There are several options outlined by others in the archives for the curved plate and light installation. I planned to do this but didn’t have the parts available when I took the pac off and I wanted to ride. So, we used the bracket that came with the kit to get on the road. It didn’t exactly enhance the looks of the bike but it worked. However, it’s not a good fit for the detachable system because it’s in the way if you want to add a luggage rack or wish to clean up the back fender.
Code: [Select]
http://www.kiroastro.com/images/harleys/plate.jpg
The balance of the wiring was rolled up and stored, mostly in the left/right side covers. We carefully pushed the bundles below the frame to get everything out of the way and secured with cable ties.
Code: [Select]
http://www.kiroastro.com/images/harleys/storage.jpg
After getting everything in place, we called it a day and took the bikes out to do some riding.
Code: [Select]
http://www.kiroastro.com/images/harleys/7033.jpg
Logged

kiro

  • 1K CVO Member
  • *
  • Offline Offline
  • Posts: 1658
    • ME


    • CVO1: 2017 FLHTKSE
    • CVO2: 1986 FXR Super Glide - antique, but the Evo lives on!
    • A Shot in the Dark
2013 SEUC Detachable Tour-Pac - My Summary, Corrected
« Reply #1 on: June 09, 2015, 02:20:35 PM »

Sorry - corrected Version...

As others have on the forum, I decided to make my King Tour Pac detachable on my CUSE8, using the H-D Detachable Tour-Pac Conversion kit, 53246-09B. My son Matt is a good mechanic with a lot of motorcycle experience and we did this together in my driveway.


I wanted to modify the bike for around town riding without the tour-pac, so in the immediate timeframe decided to remove it along with the amp, disabling all audio until making a determination for the amp relocation. I have audio capability through a Sena 20S Blue-Tooth headset linked to my phone to use in the interim.


Although the amp under the tour-pac is problematic, the MoCo did okay with disconnects for all the components in/around it. We labeled all the wiring and photographed everything in high resolution for record and ‘just in case’ during the process. On my bike the power locks to the side bags were already isolated so nothing had to be done to retain this function.


With the wiring addressed, the four bolts holding the tour-pac were removed and it was dismounted. I already had an Anderson relocator plate installed as can be viewed in the image below.


With the pac removed the balance of the disconnect kit could be installed. For anyone that just has to know what a King Tour-pac actually weighs see the image below. Mine was 46.2 pounds empty with the liners removed.


The detachable hardware was installed and the two-up platform fitted. This didn’t present any significant challenges with the kit instructions. Once the platform was adjusted we reinstalled it and the Anderson relocator on the tour-pac and tried it with the detach rack. It worked fine but I think this would prove difficult as a one person operation if being careful not to scratch anything.


I'd been researching and talked to several parts people at two dealerships thinking about the license plate relocation. There are several options outlined by others in the archives for the curved plate and light installation. I planned to do this but didn’t have the parts available when I took the pac off and I wanted to ride. So, we used the bracket that came with the kit to get on the road. It didn’t exactly enhance the looks of the bike but it worked. However, it’s not a good fit for the detachable system because it’s in the way if you want to add a luggage rack or wish to clean up the back fender.


The balance of the wiring was rolled up and stored, mostly in the left/right side covers. We carefully pushed the bundles below the frame to get everything out of the way and secured with cable ties.


After getting everything in place, we called it a day and took the bikes out to do some riding.


Logged

kiro

  • 1K CVO Member
  • *
  • Offline Offline
  • Posts: 1658
    • ME


    • CVO1: 2017 FLHTKSE
    • CVO2: 1986 FXR Super Glide - antique, but the Evo lives on!
    • A Shot in the Dark
2013 Detachable Tour-Pac - Part II - Plate Relocation
« Reply #2 on: June 09, 2015, 02:45:13 PM »

The next day was Sunday and I was up to do some more riding minus the tour-pac. When I bought the detach kit, the H-D parts guy insisted I needed the optional wiring harness for my bike - #70032-09, which I was certain I didn’t. The dealership in New Hampshire is open every day so I rode down to do the return. I carried the wiring harness in and talked to an older parts person (older being relative at my age) - I thought there was going to be trouble as he indicated that was an electrical part, therefore non-returnable. Eventually we got over that hump once I explained the situation and never used anything in the box. I thought this fellow was going to be a real PIA, but in the end result he knew more about what I was looking to do than anybody else previously. I got him to review the parts catalog for my bike because I had questions on several things noted. Although it took time, we were able to identify everything required to make the plate relocation fairly simple.  This guy deserves recognition because he persisted until he found the part number for the plate light that three others told me simply didn’t exist. I purchased a straight plate bracket in lieu of the curved version. The parts list included:
Painted License Plate Bracket, #69380-09BHP
Light Assembly with Lens, #693353-05
Two - 6/32 X 3/8” pan screws & a fender cushion so the plate bracket can’t strike the fender
Parts total was $71.75


I met up with Matt and we went to a friend’s house to install the plate relocation parts. The plate holder bolted in perfectly to the light bar and the infamous light assembly dropped right in. On my bike this light would serve to illuminate the license plate no matter what shape the bracket is. Although I didn’t bother, you can purchase LED’s for it as well. I didn’t add a decorative frame to dress up the plate but can so later if I desired – I didn’t want to add to the overall size. Without one it exhibits more of the CVO medallion. 


I have a layback LED tail lamp and wiring the plate light wasn’t all that straight forward. The connectors had to be changed but we had what was required on hand to complete the task. Matt cleverly disabled the LED’s from shining through the top lens so nothing further had to be done in this regard. The image below shows the completed assembly.


The image below shows the completed assembly.


I’m researching the amp relocation to get the audio back up. It certainly looks easiest to place the amp in a saddlebag. At this point the first two parts have been completed and do I ever enjoy the ride without the tour-pac… I’d been investigating a seat change also – solo or two up, but as JC has commented on more than once, the stock seat is quite comfortable and I have no issues with it. The image below is at the end of the weekend with the modifications and tour-pac removed.


Logged

tdowell65

  • Full CVO Member
  • ***
  • Offline Offline
  • Posts: 115

    • CVO1: 2013 SEUC 8
Re: 2013 SEUC Detachable Tour-Pac - My Summary
« Reply #3 on: June 14, 2015, 07:20:42 PM »

Very Nice.  Have the same bike and have thought about doing that as well.. Just seems like the wife always likes to ride and we always need the room. Bet that 46 lbs feels like a load of the back. 
 
Logged

kiro

  • 1K CVO Member
  • *
  • Offline Offline
  • Posts: 1658
    • ME


    • CVO1: 2017 FLHTKSE
    • CVO2: 1986 FXR Super Glide - antique, but the Evo lives on!
    • A Shot in the Dark
Re: 2013 SEUC Detachable Tour-Pac - My Summary
« Reply #4 on: June 14, 2015, 11:03:10 PM »

That certainly is the case tdowell65... I did over eight hours on the bike this weekend and have never enjoyed it more. I'll get it set up to simplify re-connections so when I plan an extended trip I can mount the tour pac. Most of my trips have been solo & no more than four to six hours from home one way. I do miss the convenience of the quick storage and things I generally left on the bike all the time, but it's actually easier to tie off my camera gear, which weighs about the same or less than the tour pak when I carry it along. I definitely like the bike better now for the type of riding I've been doing...
Logged

kiro

  • 1K CVO Member
  • *
  • Offline Offline
  • Posts: 1658
    • ME


    • CVO1: 2017 FLHTKSE
    • CVO2: 1986 FXR Super Glide - antique, but the Evo lives on!
    • A Shot in the Dark
Completed Tour-pak Detach Conversion
« Reply #5 on: June 28, 2015, 05:06:48 PM »

I purchased MoCo detach kit (53246-09B) to dismount my tour-pak but hadn’t completed the conversion to re-install it with wiring/speaker disconnects. The primary concern was the amp relocation on my bike as many of us are aware. I contacted Infocus Mobile Audio in New Hampshire and ended up with an appointment to have the amp placed in the fairing. Justin O’Neil, the owner suggested a web based integrated system with everything cabled. Although not any kind of audiophile, I had him upgrade the system figuring it would be a one-time expense. Justin also does wiring when his schedule permits, so I got everything completed at the same time.


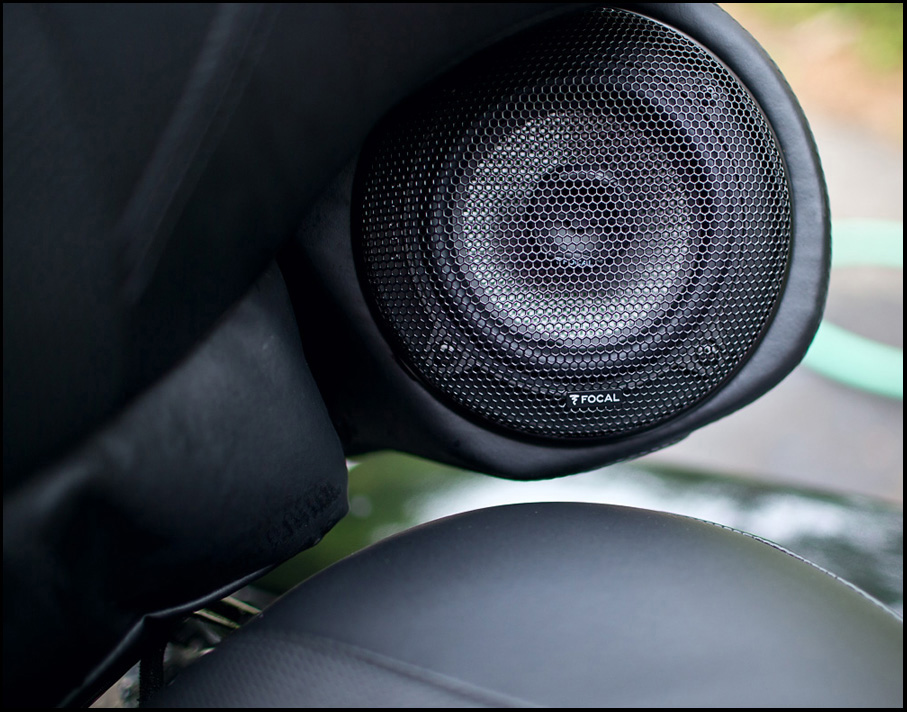
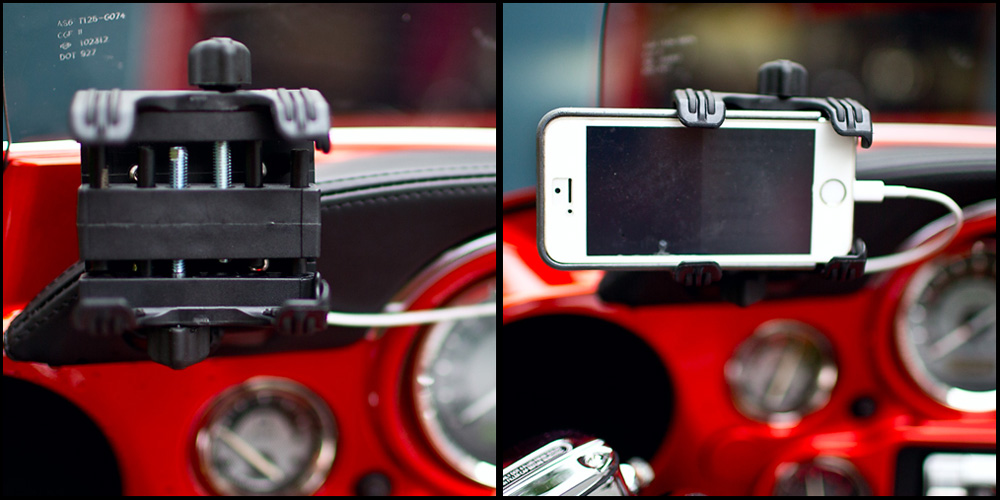
The audio upgrades consisted of a one-on-one speaker exchange. Nothing new here, the same mods with a basic system done by countless others on CVO’s or standard bikes. I wasn’t interested in adding any speakers and wished to keep it simple. Focal Access 130 AC 5” speakers were used in the rear. Focal 165 KRC, 6½” speakers were placed in the fairing and modified to fit with the larger size from stock and a Rockford Fosgate Power T400X4AD amp was fairing mounted. Justin used the stock GPS bracket modified to accept a Kurakyn phone bracket for my iPhone, which will now be cabled in and used to stream audio and for navigation. I can re-install the stock GPS if I choose to do so.


I had the H-K tuner unit replaced with a Kenwood KMR 555u marine unit while the fairing was opened up. This is set up for web-based audio like Pandora & I Heart Radio, includes a CD bay and has inputs for other media players and a USB flash drive. Media on my phone can also be streamed, music or audio books. The CB, satellite radio and on-board intercom were removed from the system. Antennas are no longer required so both cables were removed for the tour-pak reconnect, although there is an FM antennae in the fairing.


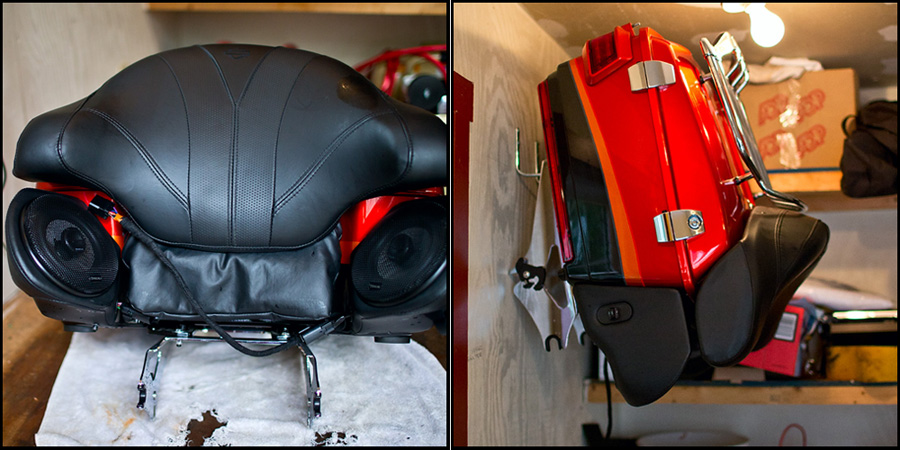
When the tour-pak is mounted there are three connections required to get everything working. A left/right speaker connection and a grouped electrical harness. Everything in the tour-pak works just like stock. The electrical wiring is taped in orange in the image left below, at right is a speaker connection.


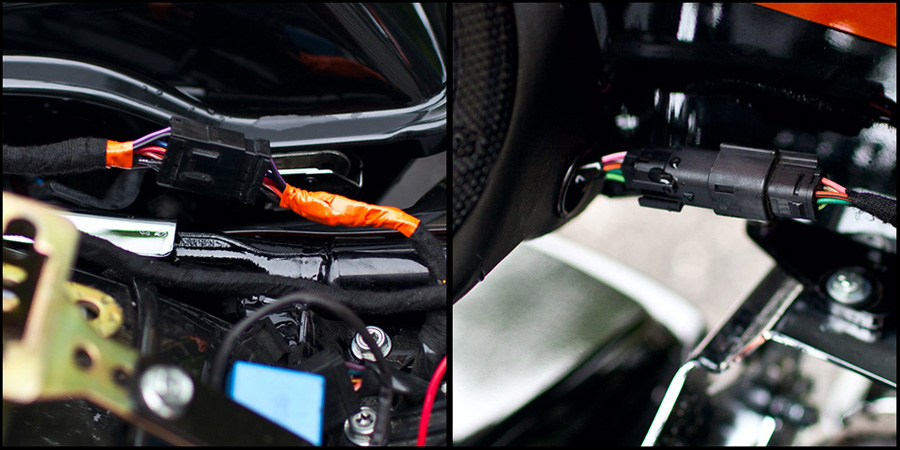
With the tour-pak off the cables are tucked under the seat as noted at left below. The right image is the cables connected with the pak mounted.


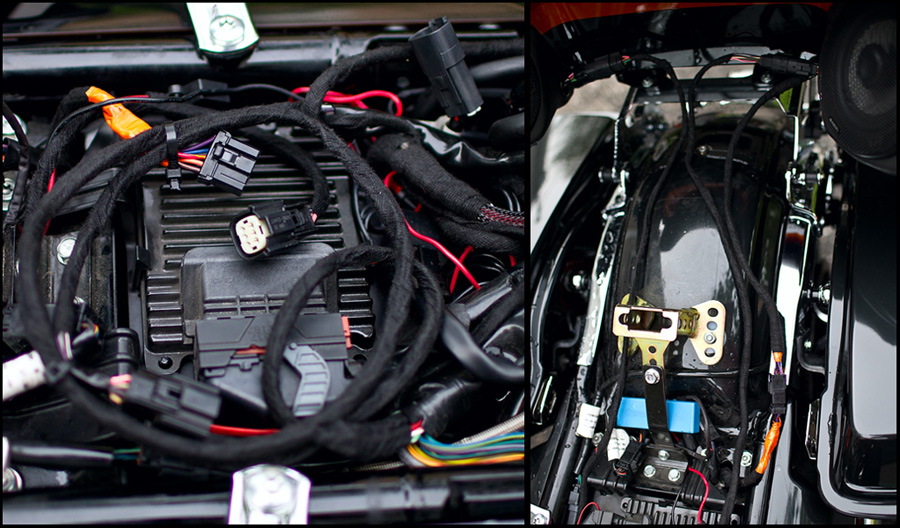
When dismounted the largest portion of the electrical whip is left on the tour-pack and it’s hung on the wall.


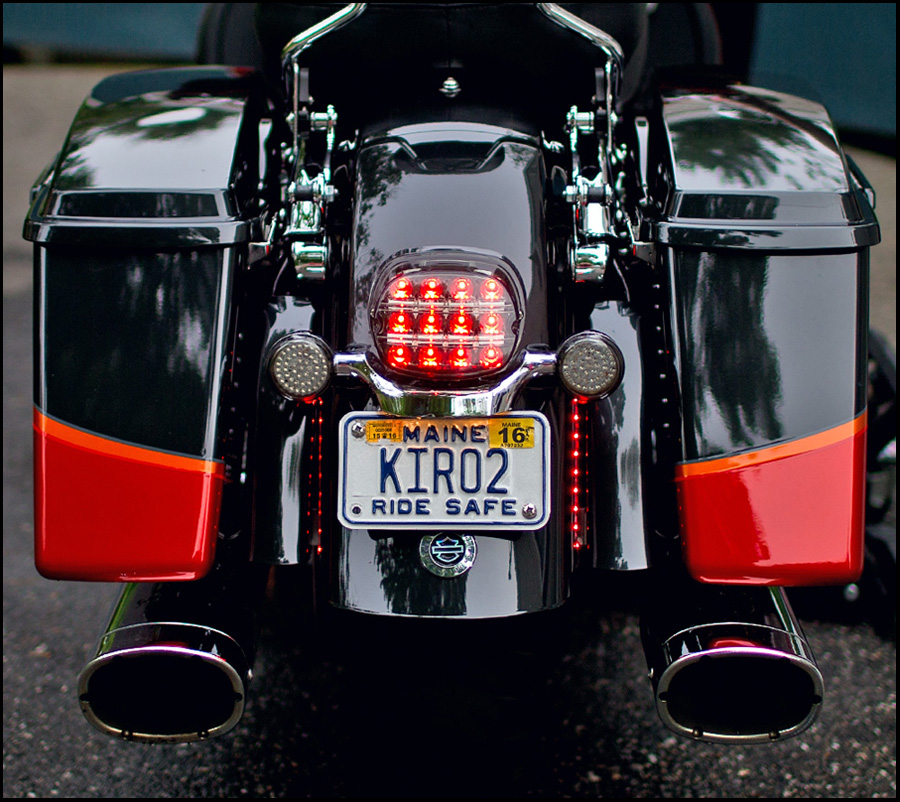
I was concerned with the lighting decrease with the tour-pak off, so had Justin install LED strips at each filler at the bags. These are bright, much brighter than they appear in the image below, and serve as running/brake lights.


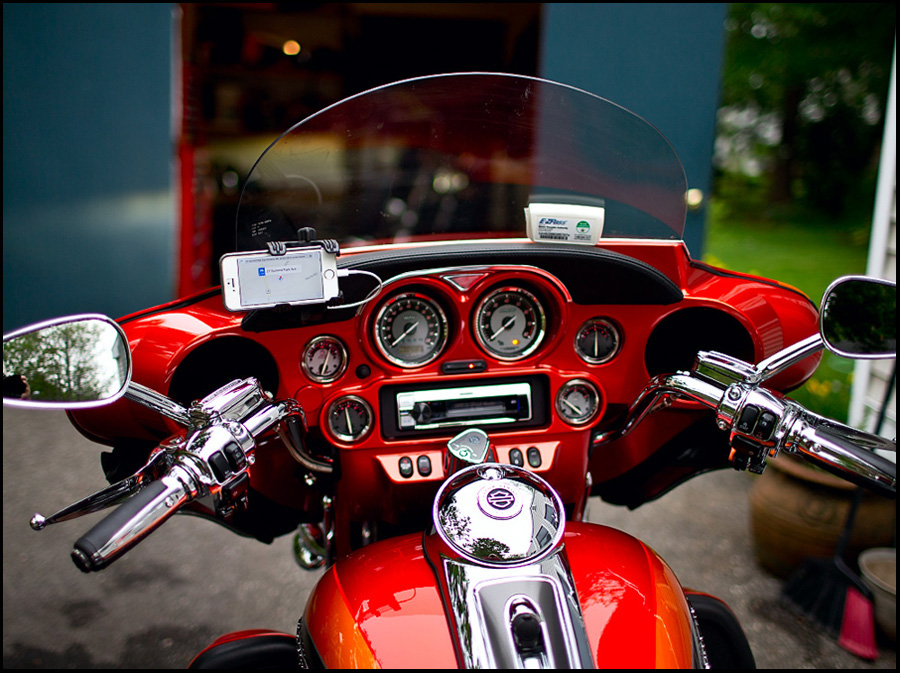
Below is a shot of the dash with the Focal speakers, head unit and phone in place – really not much different in appearance. The difference with the new audio system is pronounced however. I suffer from hearing loss and tinnitus so always ride with earplugs against wind noise. With plugs in and wearing a half shell the quality impact between stock audio and now is amazing when cruising at 80 mph on the turnpike yesterday.  The stock system was loud enough in comparison, but lacked the definition and nuance of the Focal speakers. I’ve only ridden 120 miles since the install but so far have no regrets with the audio upgrades or not doing this myself.


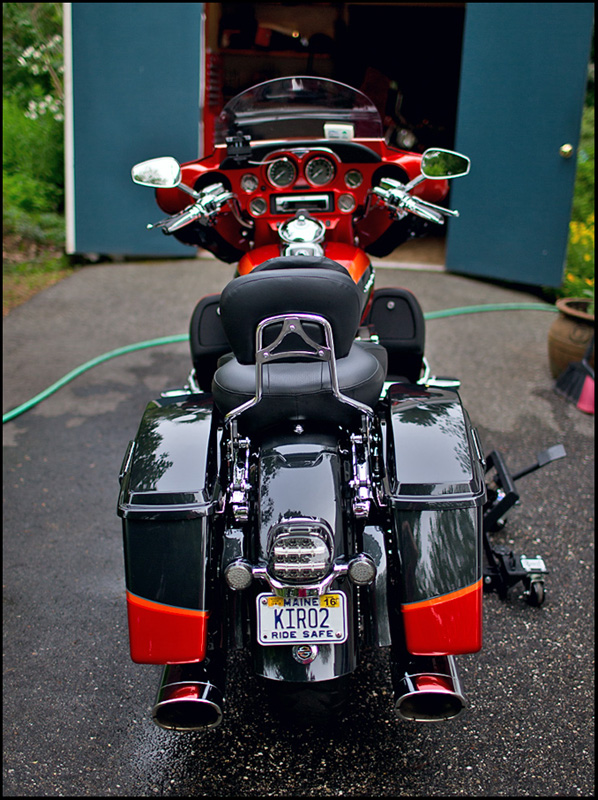
With the detachable tour-pack conversion completed


Logged

moto4sho

  • Newbie
  • *
  • Offline Offline
  • Posts: 36
  • www.CVOHARLEY.com
    • TX

Re: 2013 SEUC Detachable Tour-Pac - My Summary
« Reply #6 on: February 25, 2016, 12:41:21 PM »

Awesome, appreciate all the detail and pics!
Logged

Chains

  • 5k CVO Member
  • ***
  • Offline Offline
  • Posts: 8459
  • 2006 FLHTCUSE
    • FL

Re: 2013 SEUC Detachable Tour-Pac - My Summary
« Reply #7 on: February 25, 2016, 01:04:49 PM »

Great job and fantastic documentation. :2vrolijk_21:
Logged
2009 FLHTCUSE
12 inch Monkey bars
Stage one kit
Fullsac SS titanium coated DX dual pipe
Kuryakyn 4 inch Mellow Crushers
Color Matched Bushtec Turbo 2
1st Active member of the CVO Critter Gawkers Society

kiro

  • 1K CVO Member
  • *
  • Offline Offline
  • Posts: 1658
    • ME


    • CVO1: 2017 FLHTKSE
    • CVO2: 1986 FXR Super Glide - antique, but the Evo lives on!
    • A Shot in the Dark
Re: 2013 SEUC Detachable Tour-Pac - My Summary
« Reply #8 on: February 25, 2016, 04:39:41 PM »

Thanks guys!
Logged

OakleyFreak

  • Full CVO Member
  • ***
  • Offline Offline
  • Posts: 116
  • www.CVOHARLEY.com
    • IL


    • CVO1: 2010 FLHTCUSE5 Amber/Citrus
Re: 2013 SEUC Detachable Tour-Pac - My Summary
« Reply #9 on: February 25, 2016, 06:31:56 PM »

I didnt want the amp in my bags  so I did it like this guy did his

http://www.cvoharley.com/smf/index.php?topic=101825.0
Logged

kiro

  • 1K CVO Member
  • *
  • Offline Offline
  • Posts: 1658
    • ME


    • CVO1: 2017 FLHTKSE
    • CVO2: 1986 FXR Super Glide - antique, but the Evo lives on!
    • A Shot in the Dark
Re: 2013 SEUC Detachable Tour-Pac - My Summary
« Reply #10 on: February 25, 2016, 08:22:18 PM »

Quote
I didnt want the amp in my bags  so I did it like this guy did his

I considered this as well, but thought it would be better in the fairing, where I thought it should have been in the first place. I'm sure the external mount works well and is a great solution.
Logged
 

Page created in 0.198 seconds with 21 queries.