Please login or register.

Login with username, password and session length
Advanced search  
Pages: 1 2 3 ... 5 [All]

Author Topic: DayMaker Headlight Installation for Road Glide  (Read 49584 times)

0 Members and 1 Guest are viewing this topic.

DesertHOG

  • Visiting America One Road Trip at a Time
  • 2.5K CVO Member
  • **
  • Offline Offline
  • Posts: 3747
  • Vivid Black Special
    • NM


    • CVO1: 2011 FLTRUSE - SOLD
    • CVO2: 2015 FLTRUSE - SOLD
    • CVO3: 2018 FLTRXS - Vivid Black
    • Join me on Facebook
DayMaker Headlight Installation for Road Glide
« on: January 06, 2013, 12:32:25 AM »

There used to be a documented installation guide on the site but the creator removed it when he left the site. I was sorry to see that happen as I decided to install the Black and Chrome DayMaker (Part#: 67700112) on my '11 FLTRUSE. So I decided to document my afternoon's work and share it with my CVOHarley.com friends.

Some people are going to ask, why would ANYONE spend that much money on a pair of headlights for a Road Glide? So rather than telling folks to mind their own "chit", I'll give you a few of the reasons that I decided to install the terribly expensive ($699 MSRP) headlights when other fine solutions are available.

1. I installed HID lights on my '09 FLTR. Maybe something was done wrong, but my radio got noise/poor reception on too many stations - I think it's the ballasts. I used an internal antenna. Maybe that contributes to the cause. Anyway, I don't want to run that risk again.
2. The lens on my current headlights was cracked. I must have picked up a stone on the road someplace.
3. One of the lamp low-beams on my current headlight was burned out.
4. These damn DayMakers just look REALLY REALLY COOL!! (Granted your perception of cool may differ from mine)
5. Lake Shore Harley (www.lshd1.com) sells HD parts at 20% off and I got free shipping.
6. Mrs Claus was very good to me at Christmas.

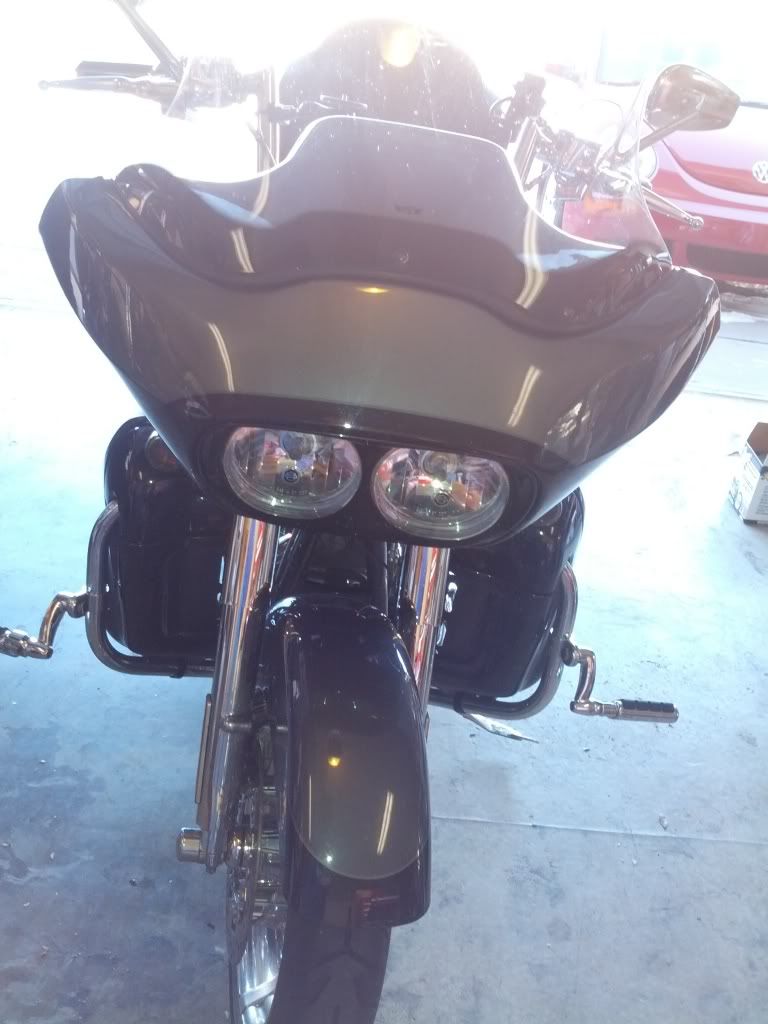
Now onto the installation. Here's my bike before the installation. I put it up on the center-stand to make everything look just a little more even.


As delivered by UPS.


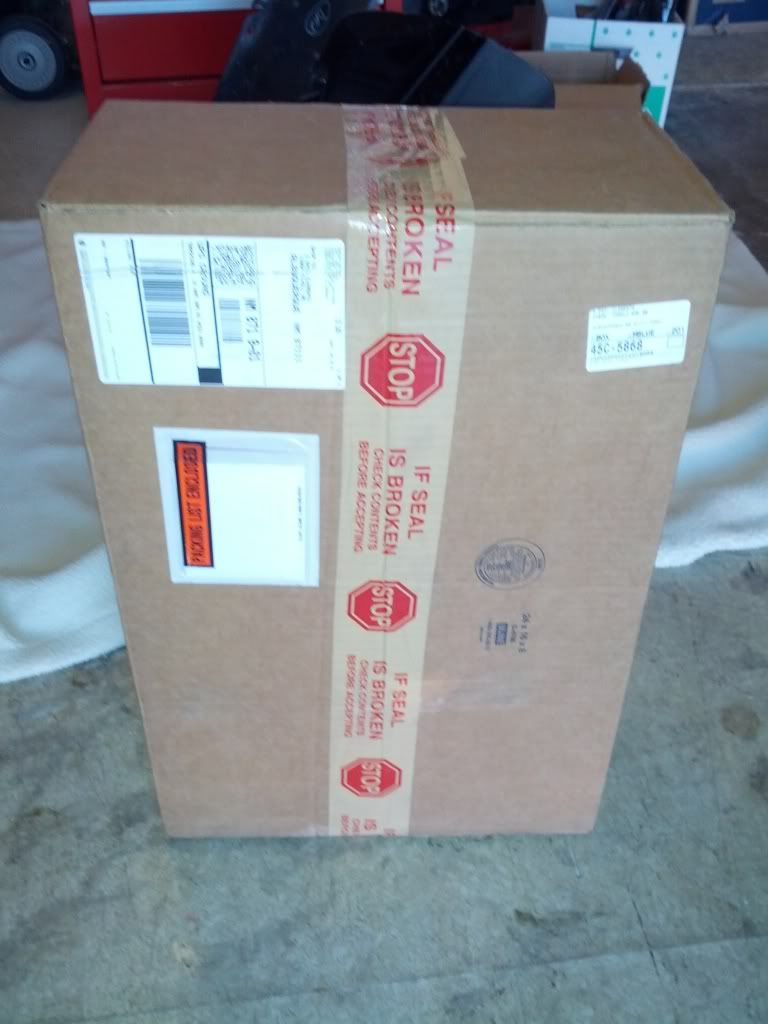
From Lake Shore Harley (I gave my dealer a chance to match the price and they ignored me. So 20% off and no sales tax!)


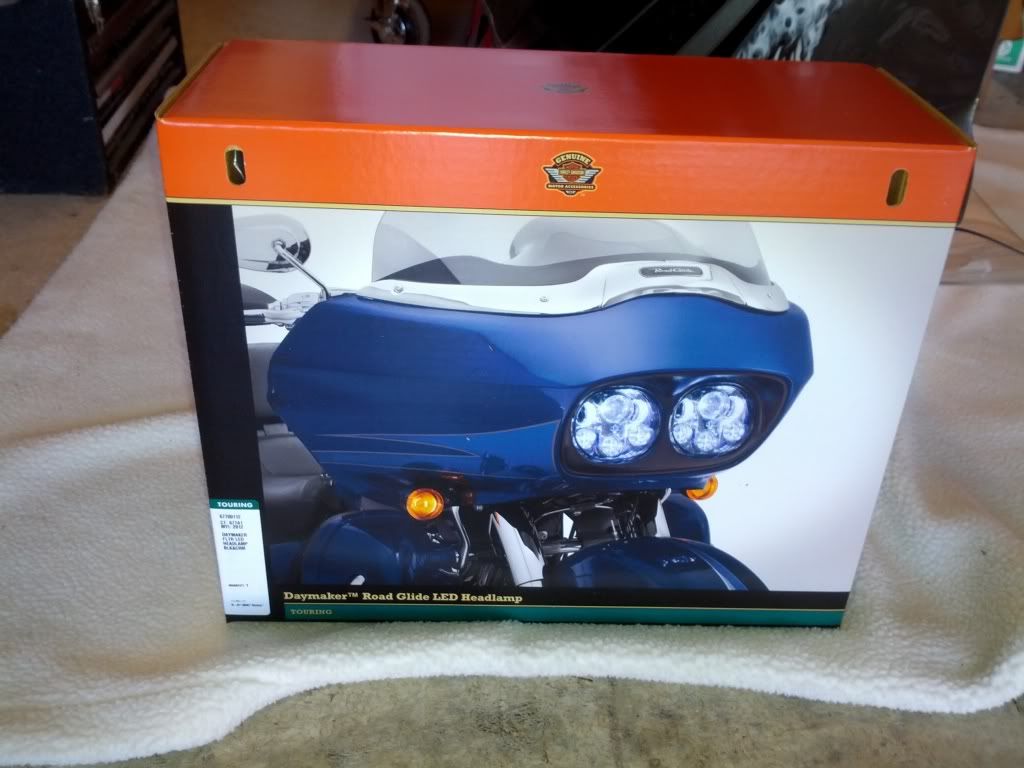
DayMaker packaging: Front


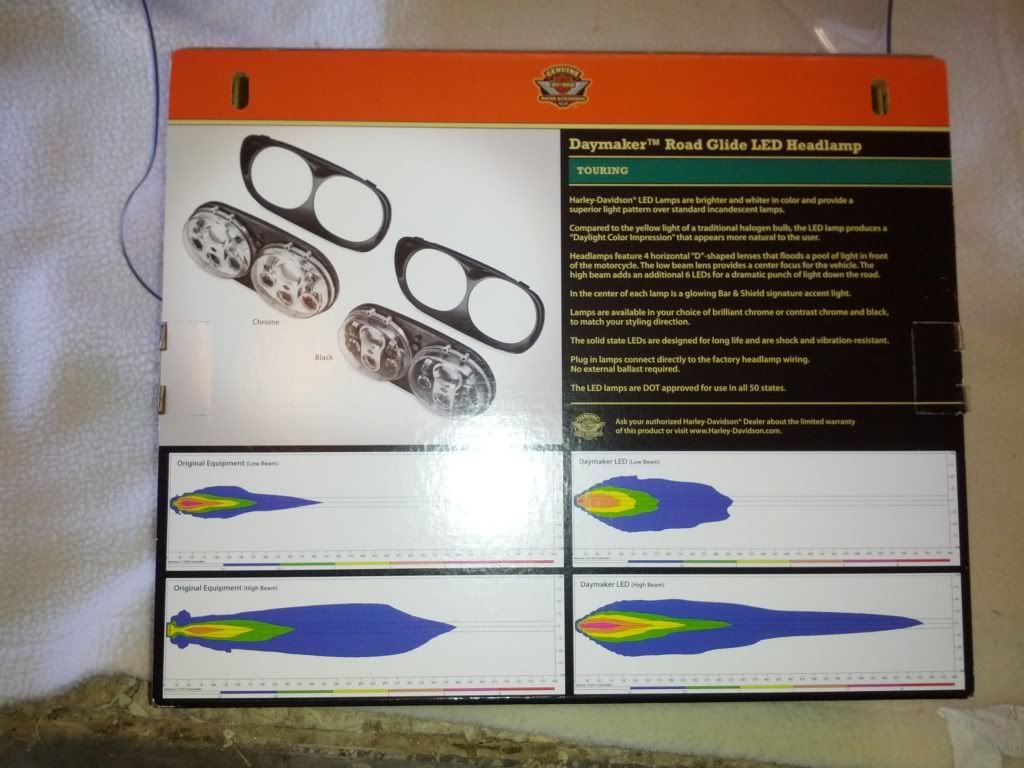
DayMaker packaging: Back


Logged

DesertHOG

  • Visiting America One Road Trip at a Time
  • 2.5K CVO Member
  • **
  • Offline Offline
  • Posts: 3747
  • Vivid Black Special
    • NM


    • CVO1: 2011 FLTRUSE - SOLD
    • CVO2: 2015 FLTRUSE - SOLD
    • CVO3: 2018 FLTRXS - Vivid Black
    • Join me on Facebook
Re: DayMaker Headlight Installation for Road Glide
« Reply #1 on: January 06, 2013, 12:32:57 AM »

This is everything that comes in the DayMaker kit.
- Headlight Bezel
- LED Headlight Assembly
- Wire harness, heat shield, tie-wraps
- Inner reinforcement bracket
- Outer reinforcement bracket
- Instructions (yes, I read them)


Tools required for the job.
- Torx Driver #25
- 1/2" Box Wrench
- Electric Drill
- 17/64" Drill bit
- Small standard screwdriver or awl


Start by removing the screws from the inner fairing. Start at the top and work your way to the bottom (3 per side)


Place your parts in a clean area so you can find them again  :D


Remove the front turn signal lights by removing the two acorns nuts. Repeat on other side.  


Here's a good video that shows how to remove and install the fairing on a Road Glide.
« Last Edit: January 06, 2013, 01:36:05 AM by DesertHOG »
Logged

DesertHOG

  • Visiting America One Road Trip at a Time
  • 2.5K CVO Member
  • **
  • Offline Offline
  • Posts: 3747
  • Vivid Black Special
    • NM


    • CVO1: 2011 FLTRUSE - SOLD
    • CVO2: 2015 FLTRUSE - SOLD
    • CVO3: 2018 FLTRXS - Vivid Black
    • Join me on Facebook
Re: DayMaker Headlight Installation for Road Glide
« Reply #2 on: January 06, 2013, 12:33:26 AM »

Dangling turn signal light.


Acorn nuts added to the parts collection area. As you can see, one of the nuts came off with the threaded bolt in place. I also found out that my Certified HD Technician didn't replace any of the washers that are supposed to be under the acorns nuts. Anyone surprised?


Here's where the octopus of wires and harnesses reside in your Road Glide.


Outer Fairing safely removed.


« Last Edit: January 06, 2013, 01:06:37 AM by DesertHOG »
Logged

DesertHOG

  • Visiting America One Road Trip at a Time
  • 2.5K CVO Member
  • **
  • Offline Offline
  • Posts: 3747
  • Vivid Black Special
    • NM


    • CVO1: 2011 FLTRUSE - SOLD
    • CVO2: 2015 FLTRUSE - SOLD
    • CVO3: 2018 FLTRXS - Vivid Black
    • Join me on Facebook
Re: DayMaker Headlight Installation for Road Glide
« Reply #3 on: January 06, 2013, 12:34:01 AM »

On the front lower section of the headlight assembly, there are two small holes to the left and right of center. Gently pry with a small standard screwdriver or awl to loosen the headlight bezel. Perform same action on alternate side. With your fingers, pull away the bezel from the bottom and move your fingers around the top of the bezel increasing the gap along the way.


View with the bezel removed.


View with the headlight assembly removed from front of fairing.


When the headlight assembly is still install in the fairing, you need to squeeze firmly on the green clips so they will release. Once all 3 are released, the headlight assembly will come out with a gentle wiggling to encourage it.


Inside of the outer fairing with headlight assembly removed.
« Last Edit: January 06, 2013, 01:29:53 AM by DesertHOG »
Logged

DesertHOG

  • Visiting America One Road Trip at a Time
  • 2.5K CVO Member
  • **
  • Offline Offline
  • Posts: 3747
  • Vivid Black Special
    • NM


    • CVO1: 2011 FLTRUSE - SOLD
    • CVO2: 2015 FLTRUSE - SOLD
    • CVO3: 2018 FLTRXS - Vivid Black
    • Join me on Facebook
Re: DayMaker Headlight Installation for Road Glide
« Reply #4 on: January 06, 2013, 12:34:40 AM »

Place the inner reinforcement bracket in place to determine fitting.


Once you are happy with the fitting, remove the adhesive protector by pulling the tabs and press the bracket in place.


Once the adhesive is secure (about 1 min), drill two holes (per instruction) to be able to receive the bolts attached to the outer reinforcement bracket.


Outer reinforcement bracket install using the 2 drilled through-holes.


Secure the inner and outer reinforcement brackets with the self-locking nuts.

« Last Edit: January 06, 2013, 01:13:32 AM by DesertHOG »
Logged

DesertHOG

  • Visiting America One Road Trip at a Time
  • 2.5K CVO Member
  • **
  • Offline Offline
  • Posts: 3747
  • Vivid Black Special
    • NM


    • CVO1: 2011 FLTRUSE - SOLD
    • CVO2: 2015 FLTRUSE - SOLD
    • CVO3: 2018 FLTRXS - Vivid Black
    • Join me on Facebook
Re: DayMaker Headlight Installation for Road Glide
« Reply #5 on: January 06, 2013, 12:35:11 AM »

Press the new LED Headlight assembly into place from the front. The back view shows the green snaps secured in place. This part of the operation truly was a "snap".


Front view of the newly installed LED Headlight assembly.


Wire harness that comes with the kit. The LED Headlight assembly has a 4 pin connector. The harness converts the signal wires to service the two 3 prong plugs and the single orange/white running light connector.


The instructions state to install the wire harness, as seen below.


Then the instructions state to install the heat shield on the left-side wire assembly using the tie-wraps. Needless to say, this means disconnecting the harness. Save your self some time and install the heat shield first and then install the harness.   

« Last Edit: January 06, 2013, 01:20:17 AM by DesertHOG »
Logged

DesertHOG

  • Visiting America One Road Trip at a Time
  • 2.5K CVO Member
  • **
  • Offline Offline
  • Posts: 3747
  • Vivid Black Special
    • NM


    • CVO1: 2011 FLTRUSE - SOLD
    • CVO2: 2015 FLTRUSE - SOLD
    • CVO3: 2018 FLTRXS - Vivid Black
    • Join me on Facebook
Re: DayMaker Headlight Installation for Road Glide
« Reply #6 on: January 06, 2013, 12:35:37 AM »


So now we have the new LED Headlight assembly and wire harness installed in the outer fairing.


Back under the hood, examine the complex of wire harnesses. Note that the white arrows are pointing to the hooks that you'll be trying to use to hold the outer fairing in place during the fairing re-install. The lower white arrow is pointing out the orange/white wire you'll use to connect up the running lights.


Here is a clearer view of the light sockets that connect to the prongs and the running light wire.


Remove the red cap from the running light wire (orange/white). You are set to move the fairing into place, plug in the 3 light connects and mate/install the outer and inner fairings.

« Last Edit: January 06, 2013, 01:26:27 AM by DesertHOG »
Logged

DesertHOG

  • Visiting America One Road Trip at a Time
  • 2.5K CVO Member
  • **
  • Offline Offline
  • Posts: 3747
  • Vivid Black Special
    • NM


    • CVO1: 2011 FLTRUSE - SOLD
    • CVO2: 2015 FLTRUSE - SOLD
    • CVO3: 2018 FLTRXS - Vivid Black
    • Join me on Facebook
Re: DayMaker Headlight Installation for Road Glide
« Reply #7 on: January 06, 2013, 12:36:06 AM »

.
Getting the fairing back on was probably the hardest part of this job for me. First of all, getting the fairing to match up with the hooks was a little tricky. Then I think my other mistake was trying to put the inner fairing screws in place prior to installing the turn signals. Once I removed the fairing screws and install the turn signals for each side, the inner fairing matched up to the outer fairing pretty well. I am still not super happy with the fitment of the rubber trim but it's about 98% right.

Ignition turned to Accessory - HD Logo turn into running lights.


Low Beam


High Beam


How my Road Glide looks after the installation was completed.


If you are interested in the DayMakers, you may want to save a little money by doing the install yourself. All in all it was a great experience.
« Last Edit: January 06, 2013, 12:43:06 AM by DesertHOG »
Logged

tjablons

  • Junior CVO Member
  • **
  • Offline Offline
  • Posts: 50

    • CVO1: 2012 FLTRXSE Maple
Re: DayMaker Headlight Installation for Road Glide
« Reply #8 on: January 06, 2013, 01:54:09 AM »

Curious why there is a heat shield, and only on the left side?  BTW, nice write-up.  I have the Daymakers but am considering also doing Perewitz LED turn signals, so I'll probably install both at the same time (will only have to do the fairing removal once).

TJ
Logged

DesertHOG

  • Visiting America One Road Trip at a Time
  • 2.5K CVO Member
  • **
  • Offline Offline
  • Posts: 3747
  • Vivid Black Special
    • NM


    • CVO1: 2011 FLTRUSE - SOLD
    • CVO2: 2015 FLTRUSE - SOLD
    • CVO3: 2018 FLTRXS - Vivid Black
    • Join me on Facebook
Re: DayMaker Headlight Installation for Road Glide
« Reply #9 on: January 06, 2013, 02:11:52 AM »

Curious why there is a heat shield, and only on the left side?  BTW, nice write-up.  I have the Daymakers but am considering also doing Perewitz LED turn signals, so I'll probably install both at the same time (will only have to do the fairing removal once).

TJ


TJ, that's a great question and I have no idea. Apparently there is something on the left side that makes more heat. I could not spot anything obvious that could be the source but there must be a reason for it.

DH aka Simon
Logged

GregKhougaz

  • It's a Two Wheeled World.
  • Global Moderator
  • 5k CVO Member
  • *****
  • Offline Offline
  • Posts: 9542
    • CA


    • CVO1: '22 BMW Grand America
    • CVO2: '18 Porsche C4 GTS
    • CVO3: '22 Porsche Macan GTS and my mountain bike.
Re: DayMaker Headlight Installation for Road Glide
« Reply #10 on: January 06, 2013, 02:43:13 AM »

Great job, Simon!    :2vrolijk_21:   Thanks for the information and pictures.   :2vrolijk_21:


Consulted this thread for my install:
« Last Edit: March 08, 2013, 05:25:31 PM by GregKhougaz »
Logged


"We've got some tall tales we love to tell.  They may not be true but we sure do remember them well." 
 Sawyer Brown

When you come to a fork in the road... take it!

bandit

  • 1K CVO Member
  • *
  • Offline Offline
  • Posts: 2293


    • CVO1: FLTRSE3, TP, Saddleman Explorer
Re: DayMaker Headlight Installation for Road Glide
« Reply #11 on: January 06, 2013, 05:40:08 AM »

Good investment into security  :2vrolijk_21:

Very good documentation, thanks a lot  ;)
Logged
It is not that we have less time, it is much time that we use wrong.

SBB

  • 10K CVO Member
  • ****
  • Offline Offline
  • Posts: 16404
  • Go fast or go home! EBCM member # 2.36 .01%
    • CVO2: 2011.5 SEUC
    • CVO3: 2012 SERG
Re: DayMaker Headlight Installation for Road Glide
« Reply #12 on: January 06, 2013, 09:27:30 AM »


Simon

Great job!
Just wait till you take a ride, you will love it.
Thank you for the documentation.
My dealer installed mine but I was lucky enough to be there to watch as he did the work.
Just something about reinstalling those RG fairings that is difficult for me.
I bet I have removed and replaced 50 batwings but my 01 SERG once was enough for me.
Thanks for your thread.


SBB
Logged

2012      SERG  "Nu Blue"
2018      Goldwing   
2003      HD Electra Glide Classic Silver and Black, of course!                
2 2012   Suzuki Burgmans
2018      Shelby GT350, 963 crank hp, 825 rear wheel hp

Rio

  • 2011 CVO Road Glide Ultra Rio Ember/Black
  • 1K CVO Member
  • *
  • Offline Offline
  • Posts: 1335
  • Nick
Re: DayMaker Headlight Installation for Road Glide
« Reply #13 on: January 06, 2013, 09:55:18 AM »

Nice job!  Thank you for taking the time to throw this together.  I will definitely be looking for this thread when I get around to getting my day makers! in the past, I always made the mistake of removing my windshield first, putting the HD chrome trim is a nightmare.  This time I will remember the windshield can stay on when you remove the fairing.
Logged
Full Sac X-Pipe,
Full Sac 2.25 cores
TTS Mastertune
Progressive Monotubes
Progressive 94 Shocks
Andrews 30t sprocket
Wind Splitter Windscreen
_____________________

DesertHOG

  • Visiting America One Road Trip at a Time
  • 2.5K CVO Member
  • **
  • Offline Offline
  • Posts: 3747
  • Vivid Black Special
    • NM


    • CVO1: 2011 FLTRUSE - SOLD
    • CVO2: 2015 FLTRUSE - SOLD
    • CVO3: 2018 FLTRXS - Vivid Black
    • Join me on Facebook
Re: DayMaker Headlight Installation for Road Glide
« Reply #14 on: January 06, 2013, 10:33:42 AM »

Nice job!  Thank you for taking the time to throw this together.  I will definitely be looking for this thread when I get around to getting my day makers! in the past, I always made the mistake of removing my windshield first, putting the HD chrome trim is a nightmare.  This time I will remember the windshield can stay on when you remove the fairing.

Yeah, I left the windshield on when I removed the fairing. As I mentioned, I struggled getting the fairing back on. My tall windshield made it a little clumsy to maneuver the whole assemble. I ended up removing the windshield on the re-install just to make it easier to handle.

After deciding to put the turn signals back in place first things went a lot smoother. I think if I had a stock or short windshield I probably would have been able to leave it on the fairing for the re-install.

Simon
Logged

skratch

  • 1K CVO Member
  • *
  • Offline Offline
  • Posts: 2003
    • LA

    • CVO1: 2013 FLTRXSE2 Roman Gold/Burnt Emerald
Re: DayMaker Headlight Installation for Road Glide
« Reply #15 on: January 06, 2013, 11:37:27 AM »

great writeup and pics.  the only thing that i would change is to mention the 2 longer screws on the inner/outer fairing assembly, and instead of using a screwdriver or awl to pop the tabs on the bezel, use these: http://www.harborfreight.com/4-piece-nylon-pry-bar-installer-kit-69668.html, less chance of messing up the paint and they're cheap enough.  also, on reinstallation of the outer fairing, there are some tabs that have to overlap properly in order for the inner and outer fairing to seat properly.  they can be seen near the gloveboxes.

after going through your installation, i find that i will have to find a different power wire for my amp, i was using the red capped wire for that cause i was too lazy to route it all the way under the tank to the battery... why?  i got power right here :D
Logged
I understand the concept of reality, but find it too confining as a way of life

DesertHOG

  • Visiting America One Road Trip at a Time
  • 2.5K CVO Member
  • **
  • Offline Offline
  • Posts: 3747
  • Vivid Black Special
    • NM


    • CVO1: 2011 FLTRUSE - SOLD
    • CVO2: 2015 FLTRUSE - SOLD
    • CVO3: 2018 FLTRXS - Vivid Black
    • Join me on Facebook
Re: DayMaker Headlight Installation for Road Glide
« Reply #16 on: January 06, 2013, 12:12:33 PM »

great writeup and pics.  the only thing that i would change is to mention the 2 longer screws on the inner/outer fairing assembly, and instead of using a screwdriver or awl to pop the tabs on the bezel, use these: http://www.harborfreight.com/4-piece-nylon-pry-bar-installer-kit-69668.html, less chance of messing up the paint and they're cheap enough.  also, on reinstallation of the outer fairing, there are some tabs that have to overlap properly in order for the inner and outer fairing to seat properly.  they can be seen near the gloveboxes.

after going through your installation, i find that i will have to find a different power wire for my amp, i was using the red capped wire for that cause i was too lazy to route it all the way under the tank to the battery... why?  i got power right here :D

Yup.. video covers the two longer screws at the bottom of the fairing. The nylon wedge tools look neat. Wondering if any sort of leverage/pressure doesn't make you prone to a paint chip though? With regard to the power wire, maybe you can just insert a splice with two connectors and use it for a dual purpose.

Simon
Logged

rdawg

  • Full CVO Member
  • ***
  • Offline Offline
  • Posts: 120

    • CVO1: 2011 FLTRUSE Rio Red AKA "Red Rider"
Re: DayMaker Headlight Installation for Road Glide
« Reply #17 on: January 06, 2013, 12:25:43 PM »

great writeup and pics.  the only thing that i would change is to mention the 2 longer screws on the inner/outer fairing assembly, and instead of using a screwdriver or awl to pop the tabs on the bezel, use these: http://www.harborfreight.com/4-piece-nylon-pry-bar-installer-kit-69668.html, less chance of messing up the paint and they're cheap enough.  also, on reinstallation of the outer fairing, there are some tabs that have to overlap properly in order for the inner and outer fairing to seat properly.  they can be seen near the gloveboxes.

after going through your installation, i find that i will have to find a different power wire for my amp, i was using the red capped wire for that cause i was too lazy to route it all the way under the tank to the battery... why?  i got power right here :D
Cool, I knew i would be able to use those nylon bars for something, had them for a while.  
Thanks for the write up and pictures Simon,  have to get over my fears of getting the fairing back on.  Just need to save up 560 for the lights.  I can put in the digital gauges at the same time.

Also, any issues with the Garage door opener working with these like the HID setup seems to have?
« Last Edit: January 06, 2013, 07:53:13 PM by rdawg »
Logged

Rio

  • 2011 CVO Road Glide Ultra Rio Ember/Black
  • 1K CVO Member
  • *
  • Offline Offline
  • Posts: 1335
  • Nick
Re: DayMaker Headlight Installation for Road Glide
« Reply #18 on: January 07, 2013, 01:40:23 PM »

Yeah, I left the windshield on when I removed the fairing. As I mentioned, I struggled getting the fairing back on. My tall windshield made it a little clumsy to maneuver the whole assemble. I ended up removing the windshield on the re-install just to make it easier to handle.

After deciding to put the turn signals back in place first things went a lot smoother. I think if I had a stock or short windshield I probably would have been able to leave it on the fairing for the re-install.

Simon

I only had my fairing off on this bike once.  I had it off and on more times than I could count on my 2007 RG for various reasons.  Eventually I over torqued the screws in the fairing and stipped them.  I had to put filler in the holes and re-tap them, that sucked.  It would be nice if HD would go one step further and mount a metal insert in the fairing holes for a tighter fit.  The chrome trim with the windshield was always a bugger too.  I have a 12" shield, I have no plans on removing it when i install my lights....thanks again for the effort!
Logged
Full Sac X-Pipe,
Full Sac 2.25 cores
TTS Mastertune
Progressive Monotubes
Progressive 94 Shocks
Andrews 30t sprocket
Wind Splitter Windscreen
_____________________

anglia48

  • Full CVO Member
  • ***
  • Offline Offline
  • Posts: 156
Re: DayMaker Headlight Installation for Road Glide
« Reply #19 on: January 08, 2013, 02:14:29 PM »

I just installed the daymaker lights on my '13 RG. The job was simple enough. The hardest part was installing the faring again. WOW! Looks like ive got it lined up not too bad. The lights look awesome and are way brighter than stock.
Logged

scuba1954

  • Newbie
  • *
  • Offline Offline
  • Posts: 3
Re: DayMaker Headlight Installation for Road Glide
« Reply #20 on: February 19, 2013, 03:10:09 PM »

I have noticed a lot of people complain how much trouble they have trying to get the fairing back on after this install. The trouble some have is getting the hooks to catch the notches in the fairing. I have had my fairing on and off quite a few times. If you follow the shop manual they tell you to install the lights then put the fairing on. I have found it much easier to leave the headlights out so I can see the hooks then I plug the lights in and snap the green adjustment screw holders into the three holes. Is this not possible to do with the daymakers?
  I have bought a set and want to put them in my RG. I see your instructions (by the way that was a great install write up...thanks) say after installing the new metal support bracket to the fairing you snap the lights into the fairing, is this something that could be done after the fairing is installed. Just make sure that the wires you need access to are where they can be reached, plug them into the daymakers and then snap into place or is there something that I am missing?

Logged

DesertHOG

  • Visiting America One Road Trip at a Time
  • 2.5K CVO Member
  • **
  • Offline Offline
  • Posts: 3747
  • Vivid Black Special
    • NM


    • CVO1: 2011 FLTRUSE - SOLD
    • CVO2: 2015 FLTRUSE - SOLD
    • CVO3: 2018 FLTRXS - Vivid Black
    • Join me on Facebook
Re: DayMaker Headlight Installation for Road Glide
« Reply #21 on: February 19, 2013, 03:27:28 PM »

I have noticed a lot of people complain how much trouble they have trying to get the fairing back on after this install. The trouble some have is getting the hooks to catch the notches in the fairing. I have had my fairing on and off quite a few times. If you follow the shop manual they tell you to install the lights then put the fairing on. I have found it much easier to leave the headlights out so I can see the hooks then I plug the lights in and snap the green adjustment screw holders into the three holes. Is this not possible to do with the daymakers?
  I have bought a set and want to put them in my RG. I see your instructions (by the way that was a great install write up...thanks) say after installing the new metal support bracket to the fairing you snap the lights into the fairing, is this something that could be done after the fairing is installed. Just make sure that the wires you need access to are where they can be reached, plug them into the daymakers and then snap into place or is there something that I am missing?

I don't know. I never considered approaching it that way. I have a pretty thick arm and am not limber enough to consider this option. However, if it works for you on the regular headlight assembly, it would probably work with the daymakers. You'd just have a little less room due to the heat shield.

Good luck, Simon
Logged

scuba1954

  • Newbie
  • *
  • Offline Offline
  • Posts: 3
Re: DayMaker Headlight Installation for Road Glide
« Reply #22 on: February 19, 2013, 03:35:49 PM »

I don't know. I never considered approaching it that way. I have a pretty thick arm and am not limber enough to consider this option. However, if it works for you on the regular headlight assembly, it would probably work with the daymakers. You'd just have a little less room due to the heat shield.

Good luck, Simon


Thanks for the info. My arms are not that small either I just found it easy to make sure the Headlight plugs were hanging out the front of the fairing and after the fairing was installed I could move any wire bundles out of the way plug in the lights and snap the housing in place. Still no idea why the heat shield is only on the left side? If I read your article correct the heat shield goes on the left cable, left side being viewed while sitting on the bike...correct?

Thanks,
Mike
Logged

scuba1954

  • Newbie
  • *
  • Offline Offline
  • Posts: 3
Re: DayMaker Headlight Installation for Road Glide
« Reply #23 on: February 25, 2013, 02:02:59 PM »

I have started the install of my daymakers and got ready to put the heat shield on the harness. I was confused because the instructions say to put it on the harness that is directly behind the left light. I called HD to find out if that is the left light when sitting on the bike or the left light when viewed from the front. They told me it is the left light when sitting on the bike and the left light also has the Bumper, wire protection(item #14 in the instructions)on it. I looked closely at your pictures and it looks like you put the heat shield on the right side of the harness. Just a concern...hope I looked at your pictures incorrectly. I just see the heat shield on the light without the wire protection bumper.
Logged

ultrarider123

  • Guest
Re: DayMaker Headlight Installation for Road Glide
« Reply #24 on: February 25, 2013, 02:17:44 PM »

Simon, thanks for documenting this so well.  Have you thought about getting a job with the instructions writing department for HD parts?  'Cause the explaination along with the pics were great.  I've got this job ahead of me when we change skunk ryders lights on his RG in the next few days.  This will help a bunch in that installation.  Will post a couple pics on this thread when we start/complete the project. 
Logged

maia812

  • Guest
Re: DayMaker Headlight Installation for Road Glide
« Reply #25 on: February 25, 2013, 07:12:54 PM »

GREAT illustration on the whole job. I'm sure alot of members are thankfull for  that, GREAT JOB, Desert Hog
Logged

ultrarider123

  • Guest
Re: DayMaker Headlight Installation for Road Glide
« Reply #26 on: March 11, 2013, 07:26:56 AM »

Simon,  we worked on Skunk Ryder's RG this past Friday night.  With your instructions and pictures plus the instructions with the set along with the video of the removal/installation of the faring, it was a breeze.  Biggest issues?  Removing the old and installing the new cowling.  Everything else was great.  Here's a picture of the lights before the installation.
Logged

ultrarider123

  • Guest
Re: DayMaker Headlight Installation for Road Glide
« Reply #27 on: March 11, 2013, 07:30:33 AM »

...and a picture after the installation.  While we were doing this, we also installed the Custom Dynamics light rings front running/turn signal lights along with the load equalizer for them.  Over all, it really changed the look of the skunk.  Thanks again for all the help and posting your install.  Was great help in our endeavour
Logged

funbiker1967

  • Semper Fi
  • Full CVO Member
  • ***
  • Offline Offline
  • Posts: 177
  • 2012 CVO Ultra
Re: DayMaker Headlight Installation for Road Glide
« Reply #28 on: March 13, 2013, 09:52:34 AM »

This is why I love this site.  Read every post.  Great job!!  Very informative. 
Logged
Just remember worse things have happened to better people....

FUZZNUTS

  • 1K CVO Member
  • *
  • Offline Offline
  • Posts: 1020

    • CVO1: FLTRSE3
Re: DayMaker Headlight Installation for Road Glide
« Reply #29 on: March 24, 2013, 07:15:03 PM »

Thanks for posting this Simon, just ordered mine from Lake Shore. Caught the last day of the sale ........................................You really made it look easy to do...............Fuzz :coolblue:
Logged
Someday's you hit them like Jack Nicklaus and someday's like Jack Ass

Rio

  • 2011 CVO Road Glide Ultra Rio Ember/Black
  • 1K CVO Member
  • *
  • Offline Offline
  • Posts: 1335
  • Nick
Re: DayMaker Headlight Installation for Road Glide
« Reply #30 on: April 24, 2013, 11:45:25 AM »

Thanks again.  I finally ordered mine, they will be delivered from LSHD1 today for $569.  Printing your instructions!
Logged
Full Sac X-Pipe,
Full Sac 2.25 cores
TTS Mastertune
Progressive Monotubes
Progressive 94 Shocks
Andrews 30t sprocket
Wind Splitter Windscreen
_____________________

DesertHOG

  • Visiting America One Road Trip at a Time
  • 2.5K CVO Member
  • **
  • Offline Offline
  • Posts: 3747
  • Vivid Black Special
    • NM


    • CVO1: 2011 FLTRUSE - SOLD
    • CVO2: 2015 FLTRUSE - SOLD
    • CVO3: 2018 FLTRXS - Vivid Black
    • Join me on Facebook
Re: DayMaker Headlight Installation for Road Glide
« Reply #31 on: April 28, 2013, 07:42:15 PM »

Thanks again.  I finally ordered mine, they will be delivered from LSHD1 today for $569.  Printing your instructions!


Good luck. As someone pointed out, I think I got the heat shield on the wrong side. Seems to be working alright though.

Enjoy, DH
Logged

Rio

  • 2011 CVO Road Glide Ultra Rio Ember/Black
  • 1K CVO Member
  • *
  • Offline Offline
  • Posts: 1335
  • Nick
Re: DayMaker Headlight Installation for Road Glide
« Reply #32 on: April 28, 2013, 09:40:11 PM »

Hey, I put both wires in the heat shield, is that OK.  Here I was so proud of myself, I have no patience for instructions and this was easy.   I hope that's not a problem, don't see why it should be?
Logged
Full Sac X-Pipe,
Full Sac 2.25 cores
TTS Mastertune
Progressive Monotubes
Progressive 94 Shocks
Andrews 30t sprocket
Wind Splitter Windscreen
_____________________

GregKhougaz

  • It's a Two Wheeled World.
  • Global Moderator
  • 5k CVO Member
  • *****
  • Offline Offline
  • Posts: 9542
    • CA


    • CVO1: '22 BMW Grand America
    • CVO2: '18 Porsche C4 GTS
    • CVO3: '22 Porsche Macan GTS and my mountain bike.
Re: DayMaker Headlight Installation for Road Glide
« Reply #33 on: April 28, 2013, 10:04:06 PM »

Hey, I put both wires in the heat shield, is that OK.  Here I was so proud of myself, I have no patience for instructions and this was easy.   I hope that's not a problem, don't see why it should be?

I sense a disruption of the time / space continuum!   :nervous:   The flux capacitor may fuse causing an uncontrolled nuclear reaction.   :nervous:  That's just another way of saying I don't know but I doubt it very much.    :confused5:
Logged


"We've got some tall tales we love to tell.  They may not be true but we sure do remember them well." 
 Sawyer Brown

When you come to a fork in the road... take it!

ultrarider123

  • Guest
Re: DayMaker Headlight Installation for Road Glide
« Reply #34 on: April 29, 2013, 07:32:03 AM »

Hey, I put both wires in the heat shield, is that OK.  Here I was so proud of myself, I have no patience for instructions and this was easy.   I hope that's not a problem, don't see why it should be?

Same here with the installation we did on Rick's Skunk.  Worked out fine and didn't really see why you would only put one side of a wiring harness inside a heat shield when they both do the same things and they are both in the same general area in the faring. 
Logged

Fattbaggernknox

  • Full CVO Member
  • ***
  • Offline Offline
  • Posts: 162
Re: DayMaker Headlight Installation for Road Glide
« Reply #35 on: April 29, 2013, 09:07:33 AM »

I've read that your garage door option is deleted with this installation.. Is this correct?
Logged
2011 fltruse FBI wheels& hidden axle 574 Fuelling cams & lifters.J&M rocker series speakers & amp, Rb Racing black hole spyder 2-1, Aim-vpc92,SE 58MM TB, HPI 5.3 inj. Tuned by Strokerjlk 112.76/118.99 sae 115.42/121.85 std

Rio

  • 2011 CVO Road Glide Ultra Rio Ember/Black
  • 1K CVO Member
  • *
  • Offline Offline
  • Posts: 1335
  • Nick
Re: DayMaker Headlight Installation for Road Glide
« Reply #36 on: April 29, 2013, 10:14:15 AM »

I didn't think it would be a problem, I didn't bother reading becasue it made sense  :confused5:  Anyway, I decided to go with the CHROME version for my bike versus the blacked out version becasue of the black casing and black around the fairing?
Logged
Full Sac X-Pipe,
Full Sac 2.25 cores
TTS Mastertune
Progressive Monotubes
Progressive 94 Shocks
Andrews 30t sprocket
Wind Splitter Windscreen
_____________________

Sidney Hopkins

  • Newbie
  • *
  • Offline Offline
  • Posts: 20

    • CVO1: 2011 FLTRUSE
Re: DayMaker Headlight Installation for Road Glide
« Reply #37 on: April 29, 2013, 08:11:39 PM »

I've read that your garage door option is deleted with this installation.. Is this correct?

Negative, it still works.
Logged

Rio

  • 2011 CVO Road Glide Ultra Rio Ember/Black
  • 1K CVO Member
  • *
  • Offline Offline
  • Posts: 1335
  • Nick
Re: DayMaker Headlight Installation for Road Glide
« Reply #38 on: April 30, 2013, 09:11:21 AM »

I've read that your garage door option is deleted with this installation.. Is this correct?

No that's not correct.  When HD introduced the LED for the Ultra in 2010/11 the double halogen light had two plugs.  You had to buy an adapter, a two into one adapter and the garage door opener worked fine.
Logged
Full Sac X-Pipe,
Full Sac 2.25 cores
TTS Mastertune
Progressive Monotubes
Progressive 94 Shocks
Andrews 30t sprocket
Wind Splitter Windscreen
_____________________

tjablons

  • Junior CVO Member
  • **
  • Offline Offline
  • Posts: 50

    • CVO1: 2012 FLTRXSE Maple
Re: DayMaker Headlight Installation for Road Glide - Running Light Wire
« Reply #39 on: May 13, 2013, 11:49:54 AM »

Anyone know how the orange/white running light wire is fused?  I'm thinking of connecting my GPS to this wire without the Garmin in-line fuse.  Thought I'd cut the fuse out of the Garmin wiring since getting to it under the fairing would be a pain, but want to make sure that there's still fuse protection that's accessible in case of a problem down the road.
Logged

Fired00d

  • Global Moderator
  • 25K CVO Member
  • *****
  • Offline Offline
  • Posts: 32641
  • Orange & Black SEEG... Can it get any better?
    • VA


    • CVO1: FLHTCSE
Re: DayMaker Headlight Installation for Road Glide - Running Light Wire
« Reply #40 on: May 13, 2013, 12:25:33 PM »

Anyone know how the orange/white running light wire is fused?  I'm thinking of connecting my GPS to this wire without the Garmin in-line fuse.  Thought I'd cut the fuse out of the Garmin wiring since getting to it under the fairing would be a pain, but want to make sure that there's still fuse protection that's accessible in case of a problem down the road.
Not sure which model Garmin you are speaking of but I have the 550 and ran my wires from inside the fairing to the unit vs from the unit inside the fairing. Doing it this way you don't have to worry about passing the fused end thru the opening in the fairing and can maintain the inline fuse.

 :pumpkin:
Ride Safe,
Fired00d
 :fireman:
Logged
:pumpkin: 2004 Screamin’ Eagle Electra Glide :pumpkin:
Rinehart True Duals
SE Breather
SE Race Tuner
HogTunes Speakers
Zippers 575 Gear Drive Cams
Zippers Pro-Tapered Adjustable Push Rods
Zippers Oil Pressure Bypass Shim
Feuling Oil Pump
Feuling Lifters
Zumo 550 W/Flame Caps
Lyndall Z+ Brake Pads
CVOHarley Member #1234
PGR Member #754 (Since '05)
Proud Member EBCM #2.0

tjablons

  • Junior CVO Member
  • **
  • Offline Offline
  • Posts: 50

    • CVO1: 2012 FLTRXSE Maple
Re: DayMaker Headlight Installation for Road Glide
« Reply #41 on: May 13, 2013, 12:37:10 PM »

Thanks for the reply Fire00d.  I've got a Road Tech Zumo 660 with the complete wiring harness attached to the mount.  Not sure if I was clear in my initial post.  I can run the harness into the fairing, and wire it, but I don't want to have the the in-line fuse on the Garmin harness inside the fairing - that would be a pain in the butt to replace on the road if it ever blew.
Logged

Fired00d

  • Global Moderator
  • 25K CVO Member
  • *****
  • Offline Offline
  • Posts: 32641
  • Orange & Black SEEG... Can it get any better?
    • VA


    • CVO1: FLHTCSE
Re: DayMaker Headlight Installation for Road Glide
« Reply #42 on: May 13, 2013, 12:41:44 PM »

Ok, gotcha. Only concern I would have is when eliminating that fuse unless you have it connected to a circuit with the same size fused protection you could risk damaging the GPS. I've had my GPS for several years and never blew the inline fuse... w/that said could be a plus regarding what you are contemplating but the opposite end of the spectrum is if it was to blow it would protect the GPS instead of damaging it. Fortunately for me though the plug for the 550 was of a size that would pass thru existing holes in the fairing.

 :pumpkin:
Ride Safe,
Fired00d
 :fireman:
Logged
:pumpkin: 2004 Screamin’ Eagle Electra Glide :pumpkin:
Rinehart True Duals
SE Breather
SE Race Tuner
HogTunes Speakers
Zippers 575 Gear Drive Cams
Zippers Pro-Tapered Adjustable Push Rods
Zippers Oil Pressure Bypass Shim
Feuling Oil Pump
Feuling Lifters
Zumo 550 W/Flame Caps
Lyndall Z+ Brake Pads
CVOHarley Member #1234
PGR Member #754 (Since '05)
Proud Member EBCM #2.0

CVO in the Ozarks

  • Newbie
  • *
  • Offline Offline
  • Posts: 1
Re: DayMaker Headlight Installation for Road Glide
« Reply #43 on: May 13, 2013, 03:31:10 PM »

Thanks for the detailed information.

It was a great help in my installation on my FLTRUSE.

I purchased from LSHD1.com as well.
Logged

DesertHOG

  • Visiting America One Road Trip at a Time
  • 2.5K CVO Member
  • **
  • Offline Offline
  • Posts: 3747
  • Vivid Black Special
    • NM


    • CVO1: 2011 FLTRUSE - SOLD
    • CVO2: 2015 FLTRUSE - SOLD
    • CVO3: 2018 FLTRXS - Vivid Black
    • Join me on Facebook
Re: DayMaker Headlight Installation for Road Glide
« Reply #44 on: May 13, 2013, 03:50:13 PM »

Thanks for the detailed information.

It was a great help in my installation on my FLTRUSE.

I purchased from LSHD1.com as well.
:2vrolijk_21:
Logged

grc

  • 10K CVO Member
  • ****
  • Offline Offline
  • Posts: 14216
  • AKA Grouchy Old Fart
    • IN


    • CVO1: 2005 SEEG2
Re: DayMaker Headlight Installation for Road Glide
« Reply #45 on: May 13, 2013, 05:32:30 PM »

I've read that your garage door option is deleted with this installation.. Is this correct?

No.

Jerry
Logged
Jerry - 2005 Cherry SEEG  -  Member # 1155

H-D and me  -  a classic love / hate relationship.  Current score:  love 40, hate 50, bewildered 10.

Rio

  • 2011 CVO Road Glide Ultra Rio Ember/Black
  • 1K CVO Member
  • *
  • Offline Offline
  • Posts: 1335
  • Nick
Re: DayMaker Headlight Installation for Road Glide
« Reply #46 on: May 14, 2013, 08:59:41 AM »

Since were on the topic of garage door openers, anyone have a guess on what one is worth?  I have Liftmaster garage door openers and because of the technology, there is no way to connect the HD garage door unit to the system.
Logged
Full Sac X-Pipe,
Full Sac 2.25 cores
TTS Mastertune
Progressive Monotubes
Progressive 94 Shocks
Andrews 30t sprocket
Wind Splitter Windscreen
_____________________

grc

  • 10K CVO Member
  • ****
  • Offline Offline
  • Posts: 14216
  • AKA Grouchy Old Fart
    • IN


    • CVO1: 2005 SEEG2
Re: DayMaker Headlight Installation for Road Glide
« Reply #47 on: May 14, 2013, 01:43:21 PM »

Since were on the topic of garage door openers, anyone have a guess on what one is worth?  I have Liftmaster garage door openers and because of the technology, there is no way to connect the HD garage door unit to the system.

Check your other thread from earlier today, I left a response with a link to another thread that shows how to wire the Harley receiver directly to the control panel (wall switch) for the GDO.  The thread is about a Craftsman opener, but the high end Craftsman as well as the Liftmaster are made by the same folks (Chamberlain) and the technology is the same.

When I installed my Chamberlain last year I just took the opportunity to do away with the Harley system and use one of the regular remotes that came with the opener instead.  It's located inside the fairing and attached to a simple push button I mounted next to my spot light switch.  Much better range than what I had with the Harley system, and no dead spots in reception.  But if you prefer to keep the Harley system and you can solder a couple wires to a circuit board, you can make it work.

Jerry
Logged
Jerry - 2005 Cherry SEEG  -  Member # 1155

H-D and me  -  a classic love / hate relationship.  Current score:  love 40, hate 50, bewildered 10.

Rio

  • 2011 CVO Road Glide Ultra Rio Ember/Black
  • 1K CVO Member
  • *
  • Offline Offline
  • Posts: 1335
  • Nick
Re: DayMaker Headlight Installation for Road Glide
« Reply #48 on: May 14, 2013, 03:18:00 PM »

Thanks Jerry
Logged
Full Sac X-Pipe,
Full Sac 2.25 cores
TTS Mastertune
Progressive Monotubes
Progressive 94 Shocks
Andrews 30t sprocket
Wind Splitter Windscreen
_____________________

easttnrhino

  • Full CVO Member
  • ***
  • Offline Offline
  • Posts: 141
Re: DayMaker Headlight Installation for Road Glide
« Reply #49 on: May 23, 2013, 08:30:27 AM »

those you you who order from lake shore harley davidson how long did it take to get your lights? Thanks
Logged

DesertHOG

  • Visiting America One Road Trip at a Time
  • 2.5K CVO Member
  • **
  • Offline Offline
  • Posts: 3747
  • Vivid Black Special
    • NM


    • CVO1: 2011 FLTRUSE - SOLD
    • CVO2: 2015 FLTRUSE - SOLD
    • CVO3: 2018 FLTRXS - Vivid Black
    • Join me on Facebook
Re: DayMaker Headlight Installation for Road Glide
« Reply #50 on: May 23, 2013, 08:51:51 AM »

those you you who order from lake shore harley davidson how long did it take to get your lights? Thanks

They are not the quickest. I waited for about 2 weeks. If they don't have it in stock (unlikely) it could be longer.

DH
Logged

Rio

  • 2011 CVO Road Glide Ultra Rio Ember/Black
  • 1K CVO Member
  • *
  • Offline Offline
  • Posts: 1335
  • Nick
Re: DayMaker Headlight Installation for Road Glide
« Reply #51 on: May 23, 2013, 08:53:14 AM »

I got mine in 4 days, I live in Michigan.  This was back in April. I bought the Chrome set if that matters?
Logged
Full Sac X-Pipe,
Full Sac 2.25 cores
TTS Mastertune
Progressive Monotubes
Progressive 94 Shocks
Andrews 30t sprocket
Wind Splitter Windscreen
_____________________

Panhead_Jimmy

  • Elite CVO Member
  • *****
  • Offline Offline
  • Posts: 590
Re: DayMaker Headlight Installation for Road Glide
« Reply #52 on: May 23, 2013, 03:02:25 PM »

those you you who order from lake shore harley davidson how long did it take to get your lights? Thanks

One week from Chi-town to SoCal.  Excellent service from LSHD and the light is awesome.. worth every penny.
Logged
2004 Hemi Dodge Slammed Ram, Short Bed Std Cab
1945 Knuckle
1956 Pan
2015 FLHTKSE
2017 CVO Street Glide Orange/Starfire Black

ldireprophil

  • Junior CVO Member
  • **
  • Offline Offline
  • Posts: 79

    • CVO1: 2012 CVO Road Glide Custom Maple Metallic
Re: DayMaker Headlight Installation for Road Glide
« Reply #53 on: July 05, 2013, 11:23:44 AM »

Anyone have any issues with fingerprints on the inside of the lens of the Daymakers from the factory?
Logged
2012 CVO RGC / Renegade Lincoln Phantom 21-17 / RWD Fender / -2 Front -1 Rear / Bad Dad Side Covers / Andrews 54H Cams / HQ Black Ops Lifters / Heavy Breather / Cometic .030 HG / Barnett +1 Clutch / Aim 480lb Spring / ClutchWiz / Hayden M6 / D&D Fat Cat 2-1 w/UPB & Ghost Pipe / TTS MasterTune 2 / Wizard's Tune / Alpine CDE-HD149BT Head Unit / Alpine PDX-M6 Amp / Hertz HCX 690 / Hertz HSK 165 XL / Biketronics Module / Cycles Sounds Lids / Misc Little Things

easttnrhino

  • Full CVO Member
  • ***
  • Offline Offline
  • Posts: 141
Re: DayMaker Headlight Installation for Road Glide
« Reply #54 on: July 05, 2013, 11:31:35 AM »

Mine did not
Logged

2k

  • My ignorance is just as good as your knowledge, when my information changes, I alter my conclusions
  • 5k CVO Member
  • ***
  • Offline Offline
  • Posts: 7988
  • monter le cheval de fer (French)
    • NC


    • CVO1: 2013 SERK-Dressed in BLUE of course.
    • CVO2: 2002 Supercharged HD F150 512 RWHP
    • CVO3: 1956 BelAir Sports Coupe
Re: DayMaker Headlight Installation for Road Glide
« Reply #55 on: July 05, 2013, 12:23:18 PM »

This is the last time I will apologize  :huepfenlol2: to Simon for what I said about his lights......the Daymakers are still FUGGLY, but on a RG they are the chit. I don't think you could get a better looking setup for front of a SERG. U is de man DH.
Logged
Most Honda Goldwing riders will blink when hit in the head  with a ball-peen hammer (sans helmet)

DesertHOG

  • Visiting America One Road Trip at a Time
  • 2.5K CVO Member
  • **
  • Offline Offline
  • Posts: 3747
  • Vivid Black Special
    • NM


    • CVO1: 2011 FLTRUSE - SOLD
    • CVO2: 2015 FLTRUSE - SOLD
    • CVO3: 2018 FLTRXS - Vivid Black
    • Join me on Facebook
Re: DayMaker Headlight Installation for Road Glide
« Reply #56 on: July 05, 2013, 04:24:08 PM »

This is the last time I will apologize  :huepfenlol2: to Simon for what I said about his lights......the Daymakers are still FUGGLY, but on a RG they are the chit. I don't think you could get a better looking setup for front of a SERG. U is de man DH.

Hmm.. is that a backhanded compliment or insult .. raising the eternal SG vs RG rant. Of course we all know the RG is the 

 
Logged

roly4

  • Full CVO Member
  • ***
  • Offline Offline
  • Posts: 167
  • What?

    • CVO1: 2008 SERK - Duracell #0217 *SOLD
    • CVO2: 2012 SERG - Skunk
Re: DayMaker Headlight Installation for Road Glide
« Reply #57 on: July 20, 2013, 08:32:31 AM »

Simon, thanks for the write up. Another successful install on a Skunk this week. Re-Install on the fairing was a bit challenging. I found that my hooks were a little wide and had to bend them a cooch and then the fairing dropped right into place.

Roly aka Glenn
Logged

2k

  • My ignorance is just as good as your knowledge, when my information changes, I alter my conclusions
  • 5k CVO Member
  • ***
  • Offline Offline
  • Posts: 7988
  • monter le cheval de fer (French)
    • NC


    • CVO1: 2013 SERK-Dressed in BLUE of course.
    • CVO2: 2002 Supercharged HD F150 512 RWHP
    • CVO3: 1956 BelAir Sports Coupe
Re: DayMaker Headlight Installation for Road Glide
« Reply #58 on: July 20, 2013, 09:10:32 PM »

Simon, thanks for the write up. Another successful install on a Skunk this week. Re-Install on the fairing was a bit challenging. I found that my hooks were a little wide and had to bend them a cooch and then the fairing dropped right into place.

Roly aka Glenn
Hey Glenn, For anyone else having a problem can you break a cooch down to MM's for reference?
Logged
Most Honda Goldwing riders will blink when hit in the head  with a ball-peen hammer (sans helmet)

roly4

  • Full CVO Member
  • ***
  • Offline Offline
  • Posts: 167
  • What?

    • CVO1: 2008 SERK - Duracell #0217 *SOLD
    • CVO2: 2012 SERG - Skunk
Re: DayMaker Headlight Installation for Road Glide
« Reply #59 on: July 21, 2013, 02:26:35 PM »

Hey Glenn, For anyone else having a problem can you break a cooch down to MM's for reference?

Not a problem Jimmy! A cooch is midway between a c hair and a smidge. MM's? I failed European weights and measures.... :nixweiss:

G
Logged

SHRK2TH

  • Full CVO Member
  • ***
  • Offline Offline
  • Posts: 203

    • CVO1: 09 Street Glide / Black traded
    • CVO2: 2012 FLTRXSE White Gold Pearl / White Starfire Black
Re: DayMaker Headlight Installation for Road Glide
« Reply #60 on: July 21, 2013, 08:11:17 PM »

Heres a photo of mine with the LED turnsignal from Custom Dynamics.  They turn amber when being used,
back to white.  Love the Daymakers at night!
Logged

DesertHOG

  • Visiting America One Road Trip at a Time
  • 2.5K CVO Member
  • **
  • Offline Offline
  • Posts: 3747
  • Vivid Black Special
    • NM


    • CVO1: 2011 FLTRUSE - SOLD
    • CVO2: 2015 FLTRUSE - SOLD
    • CVO3: 2018 FLTRXS - Vivid Black
    • Join me on Facebook
Re: DayMaker Headlight Installation for Road Glide
« Reply #61 on: July 22, 2013, 09:22:26 AM »

Heres a photo of mine with the LED turnsignal from Custom Dynamics.  They turn amber when being used,
back to white.  Love the Daymakers at night!


Very nice!
Logged

Tallkid

  • Newbie
  • *
  • Offline Offline
  • Posts: 1
Re: DayMaker Headlight Installation for Road Glide
« Reply #62 on: July 28, 2013, 11:14:57 AM »

Thanks for whoever put this together. I just put in my daymakers and they look awesome. But I did find it a lot easier to put the fairing back on without the light in. Mostly so you can see the tabs that it rests on. And then unscrew the lights from the housing plate. There's 4 Phillips head screws for each light. And line up the adjusting bolts and make sure the green tabs get pressed in their right places. Then you can plugin the lights and put the screws back. This way makes it less frustrating.
Logged

charles05663

  • 1K CVO Member
  • *
  • Offline Offline
  • Posts: 1214
    • TX


    • CVO1: FLTRSE3 - Petunia
Re: DayMaker Headlight Installation for Road Glide
« Reply #63 on: July 29, 2013, 10:39:41 AM »

When I installed my DayMakers I adjusted them according to the service manual.  Is there any instructions on adjusting them?  I searched and could not find any information.

 :oops: :nixweiss:
Logged
And he saith unto them, Follow me, and I will make you fishers of men.
Matthew 4:19

http://www.thefishermenministry.net/

Q:  What is the USA's number one export to China?
A:  Trash!  They loved our high quality trash. (not any longer).

      Stolen technology and Jobs!

GregKhougaz

  • It's a Two Wheeled World.
  • Global Moderator
  • 5k CVO Member
  • *****
  • Offline Offline
  • Posts: 9542
    • CA


    • CVO1: '22 BMW Grand America
    • CVO2: '18 Porsche C4 GTS
    • CVO3: '22 Porsche Macan GTS and my mountain bike.
Re: DayMaker Headlight Installation for Road Glide
« Reply #64 on: July 30, 2013, 01:07:52 PM »

When I installed my DayMakers I adjusted them according to the service manual.  Is there any instructions on adjusting them?  I searched and could not find any information.

There were no additional instructions for adjustment in my box.  The adjustment is as in your service manual.
Logged


"We've got some tall tales we love to tell.  They may not be true but we sure do remember them well." 
 Sawyer Brown

When you come to a fork in the road... take it!

Crusty

  • 1K CVO Member
  • *
  • Offline Offline
  • Posts: 1045
  • Ex_Wingabego Rider & former Iron Butt riding fool

    • CVO1: '09 SERG
Re: DayMaker Headlight Installation for Road Glide
« Reply #65 on: August 16, 2013, 03:34:24 PM »

great writeup Simon! Off to do mine now!

Crusty

  • 1K CVO Member
  • *
  • Offline Offline
  • Posts: 1045
  • Ex_Wingabego Rider & former Iron Butt riding fool

    • CVO1: '09 SERG
Re: DayMaker Headlight Installation for Road Glide
« Reply #66 on: August 16, 2013, 08:24:54 PM »

great writeup Simon! Off to do mine now!

All right, I was good right up to the point it went downhill for everyone else... rehanging that damn outer fairing! I spent 30 minutes trying to get it lined up. >:(
 Then I adapted the advice above, left the headlight assembly out and hung it in 4 seconds.  Reconnected the lights, played around a little to get the screws through the holes and the green clips popped in and it was good to go!

Getting the sides lined up in a pain in the ass, and I think it is time to replace my trim, as the sticky is all over everything BUT the inside of the trim...  :nixweiss:

Just waiting for it to get dark so I can check them out!

charles05663

  • 1K CVO Member
  • *
  • Offline Offline
  • Posts: 1214
    • TX


    • CVO1: FLTRSE3 - Petunia
Re: DayMaker Headlight Installation for Road Glide
« Reply #67 on: August 17, 2013, 11:17:43 AM »


All right, I was good right up to the point it went downhill for everyone else... rehanging that damn outer fairing! I spent 30 minutes trying to get it lined up. >:(
 Then I adapted the advice above, left the headlight assembly out and hung it in 4 seconds.  Reconnected the lights, played around a little to get the screws through the holes and the green clips popped in and it was good to go!

Getting the sides lined up in a pain in the ass, and I think it is time to replace my trim, as the sticky is all over everything BUT the inside of the trim...  :nixweiss:

Just waiting for it to get dark so I can check them out!

Reminds me of my install. 

 :oops: :nixweiss:
Logged
And he saith unto them, Follow me, and I will make you fishers of men.
Matthew 4:19

http://www.thefishermenministry.net/

Q:  What is the USA's number one export to China?
A:  Trash!  They loved our high quality trash. (not any longer).

      Stolen technology and Jobs!

BOHICA

  • Newbie
  • *
  • Offline Offline
  • Posts: 1
Re: DayMaker Headlight Installation for Road Glide
« Reply #68 on: January 05, 2014, 05:44:48 PM »

Where did you find Perewitz LED turn Signals for your Glide?
Logged
Pages: 1 2 3 ... 5 [All]
 

Page created in 0.324 seconds with 21 queries.