I'm gonna go out to the garage and get my papers. I made a lil wiring diagram when I switched mine out.
One thing, as you noted in your last paragraph. You will not find a 'true plug and play' ...... the wiring is just not set up like that. You will have to add a couple of wires, and a module for the tach. HOWEVER, you CAN make it look like factory, or very close to it. I'll have my tank off again soon, as I start my build. I'll post up some pics .....
HEY, I got some pics. I had to also replace the speedo cable late this summer and I have pics from that job too.
BTW, if/when you ever have to replace your speedo cable, the tank will have to come off.......Taking the tank off is somwhat a pita, but I find it harder to get it BACK on than to get it off. In both cases, I wish I didn't have to do it ..... but I've had it off about 5 times.
be back in a bit
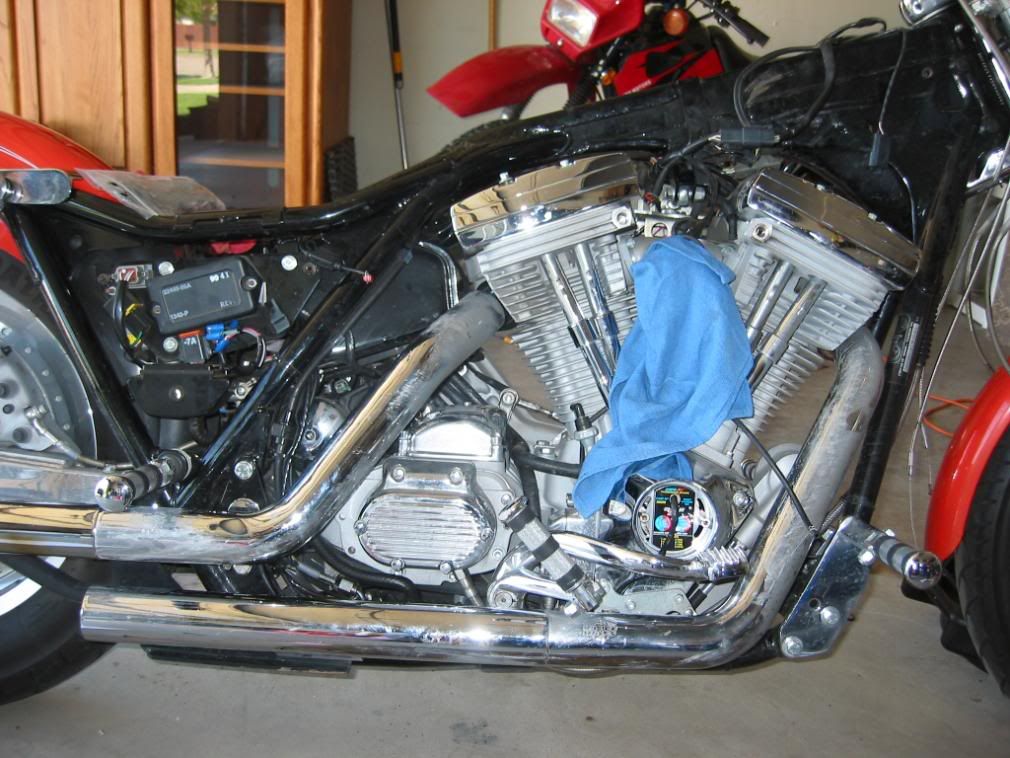
OK, here's the Compu-Fire system that I put in:
Selectable Advance Ignition Modules
The Compu-Fire selectable advance curve ignition modules are the most user friendly ignitions on the market. They feature a NEW range of advance curves to meet the needs of engines from stock to wild. The large rotary switches allow advance curve and RPM limiter selection. Easy installation is made possible with a built in LED static timing light. The modules feature extended temperature and low voltage operation with soft start circuitry for easy starting. The modules operate with single fire or dual fire coils and the VOES is tuneable.
Use with P/N 51105 Tach Adapter for single fire coil tach signal.
20600 Ignition Module Kit for stock to mild performance
1970-Later Big Twins and Sportsters (except Twin Cam)I also installed the tach adapter kit -
Use with P/N 51105 Tach Adapter for single fire coil tach signal.now, how did I wire this thing up.
first all, let me say that there was a very good set of instructions that came with the unit. Covered installation well, and timing setup and advance curve settings.
you will need to have your service manual and opened to the wiring diagram for your bike
This may be a bit long winded, and I'm getting interrupted, so I might not finish it, and will have to come back, hang with me.The installation instructions for the 20600 kit are located here:
http://www.compufire.com/pdf-instructions/nosecone.pdfin the section titled:
CONVERTING 1980 and LATER OEM ELECTRONICS TO COMPU-FIRE® IGNITION you now have the stock stuff out of the nose cone
however the ignition wires from the sensor plate is still plugged into the stock ign module. Here you have to make your first big decision about how you want to proceed. Here's what I did.
In order to get the new sensor plate wired into the harness I decided to cut the plug off of the harness and directly wire the new plate into it. I left about 6 inches of wire on the plug end so if I ever wanted to put it back I'd have enough wire to do so. I left the stock module mounted right were it was.
in this picture you can see the new module is installed in the nose cone. Look over to the left under the side cover. You'll see the stock module still there. You'll see the small coil of wires just under that. That is where I wired in the new Compu-Fire ignition into the harness. I just spliced them in, and zip tied them up using the little frame lugs that were there for the original harness.
In my case it went like this.
Red wire from module = 12+v and goes to the white/blk cable in the harness that runs to the + side of the coil
Green wire from module = voes and goes to the purple wire in the harness that runs to the voes
Black wire from module = goes to black wire in the harness that runs to the front cylinder side of the coil
White wire from the module = goes to the pink wire in the harness that runs to the rear cylinder side of the coil


 Author
Topic: Aftermarket ignition systems (Read 47771 times)
Author
Topic: Aftermarket ignition systems (Read 47771 times)