The better title for this thread wouldn't fit: "BOOM! Audio and Music Intercom Kit--P/N 77108-09--Superb CB/Intercom Solution for Non-OEM CB equipped CVO Fairing Models, 2004-2010." The virtues of this kit are: (1) allows installation of CB/Intercom without replacing the tank console; and, (2) provides passenger headset connector and passenger control without a tour pak/speaker pods. For those intested in a CB/Intecom on their fairing model CVO's, this kit may do the trick.
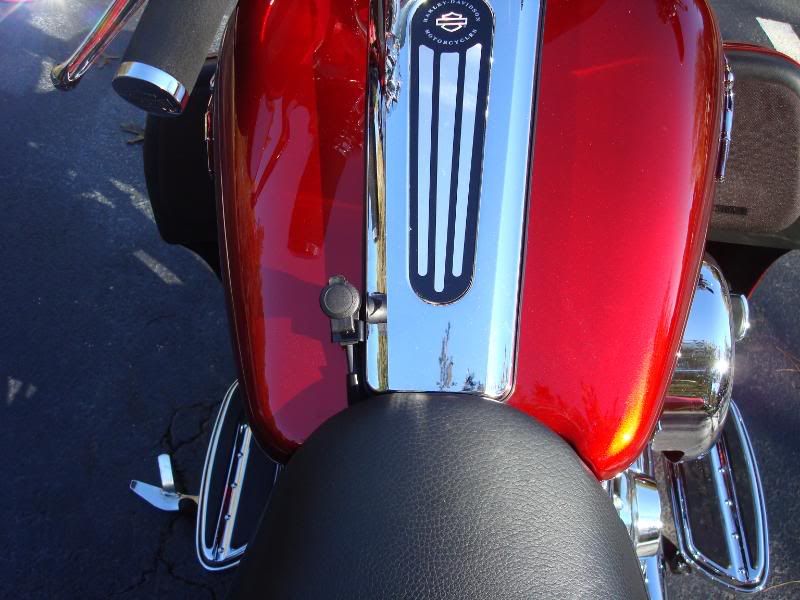
Previously, installing a CB/Intercom on a non-CB equipped, '06 or newer fairing model bike typically required replacement of the tank console. Indeed, HD's product description for the CB module, p/n 76416-06C, provides the requirement for some fairing models. Because the BAMI kit provides a headset connector that doesn't use the tank console, the OEM tank console is retained, unaltered. Here's picture of the headset connection on my bike:
http://i82.photobucket.com/albums/j260/harleypingman/BAMI%20Kit%20Installation/HKBAMIinstall023.jpg[/img]] NOTE: See reply #7 below for a clever alternative to mounting the rider headset connector on the gas tank.
 Instead of putting the passenger controls on speaker pods, the kit provides the PTT/vol. switch on the passenger headset connector stalk pictured here:
http://i82.photobucket.com/albums/j260/harleypingman/BAMI%20Kit%20Installation/HKBAMIinstall024.jpg[/img]]
The BAMI kit does not provide passenger control of the audio mode that is found on Ultra models.
The primary components in the kit are: (1) three harnesses for the rider headset connector, passenger headset connector, and passenger PTT/vol.; (2) assembled left handlebar switches/black switch housings/harness; and, (3) fairing cap "Speaker" switch.
Additional parts needed for installation/operation are: (1) non-Ultra overlay harness, p/n 70169-06; (2) CB module 76416-06C; an antenna (I used the new J&M in-fairing CB antenna); and, headset/mic (I used J&M Elite series headset and Z lower cord).
The installation instructions are included in the kit description on HD's website:
http://www.harley-davidson.com/gma/gma_product.jsp?PRODUCT%3C%3Eprd_id=845524448774053&FOLDER%3C%3Efolder_id=2534374302491575&ASSORTMENT%3C%3East_id=2534374302491575&bmUID=1257563524796&bmLocale=en_USAlthough HD's website lists fitment information as '07 and newer models, the instructions surprisingly refer to installation on
'06 FLHX, FLTR, and FLHT/C models. Speculating, the only obvious reason HD doesn't list the kit's fitment for '06 model year bikes is the handlebar switch harness supplied uses a Molex connector to connect to the interconnect harness, while '06 (and older models models) use a Deutsch connector which is not compatible with the Molex connector used by the interconnect harness. To install the kit on a pre-'07 bike, the wires must be removed from the Molex connector and the clutch interlock switch put aside, the Molex wire terminials cut-off (since they are not compatible with the Deutsch connector), new Duetsch terminal sockets attached, and the Deutsch connector reassembled. A new Deutsch connector can be purchased, but I simply used the one from my bike after I removed the OEM wires from it. The parts required for this change are listed in the third post of this thread.
Since the lefthand switches come pre-installed in the black switch housing, most will want to remove them from the black housing and reinstall them in chrome housings. A new lower chrome housing will need to be purchased to accommodate the addition of the PTT/squelch switch; the OEM upper housing is reused. The black audio and PTT switch caps need to be removed from the lower housing in order to remove these switches from the black lower housing. Pulling the switch caps while wiggling them back and forth very slightly works fine. HD includes a small, tuning fork-type plastic tool to pry them off in their chrome switch cap kits so something similar to it will work, also. If you already have chrome switch caps, you will need to buy the chrome PTT
cap and a new Audio switch cap as the one used with a PTT cap next to it is smaller than the one used with no PTT switch present. These switch caps are sold separately.
A magnetic tipped Philips screwdriver is great for removing and reinstalling the small screws that secure the metal brackets inside the housings. Also, a tech at my dealership gave me an excellent tip for reaching the screw that secures the metal plate over the Audio and PTT switches in the lower housing. The conduit covering the wires is secured with a thin zip tie to that metal plate making access to one of the screws difficult. He suggested cutting the zip tie and pulling the conduit back 6 or so inches to provide much easier access to the screw. The tip worked great when removing the switches and, again, when reinstalling the switches in the chrome lower housing. The conduit can be easily pushed back over the wires and secured with a new zip tie when reassembling the lower housing.
The switches HD uses for the Audio and PTT functions appear to be identical except for the wire colors in them and those wire colors readily identify the switch's function. To avoid confusion when reassembling, marking the Audio and PTT switches, as well as identifying the tops or bottoms of the switches is helpful.
(The thread continues in the next post.)
 Author
Topic: Boom Audio Music and Intercom Kit--77108-09--CB Solution for Non-CB CVOS et al. (Read 18809 times)

